All Activity
- Yesterday
-
.thumb.jpg.f4f1c651649609df587466bab0b90ce2.jpg)
Maulevolent’s TLJ First Order TK Build
Maulevolent replied to Maulevolent's topic in Costume Building
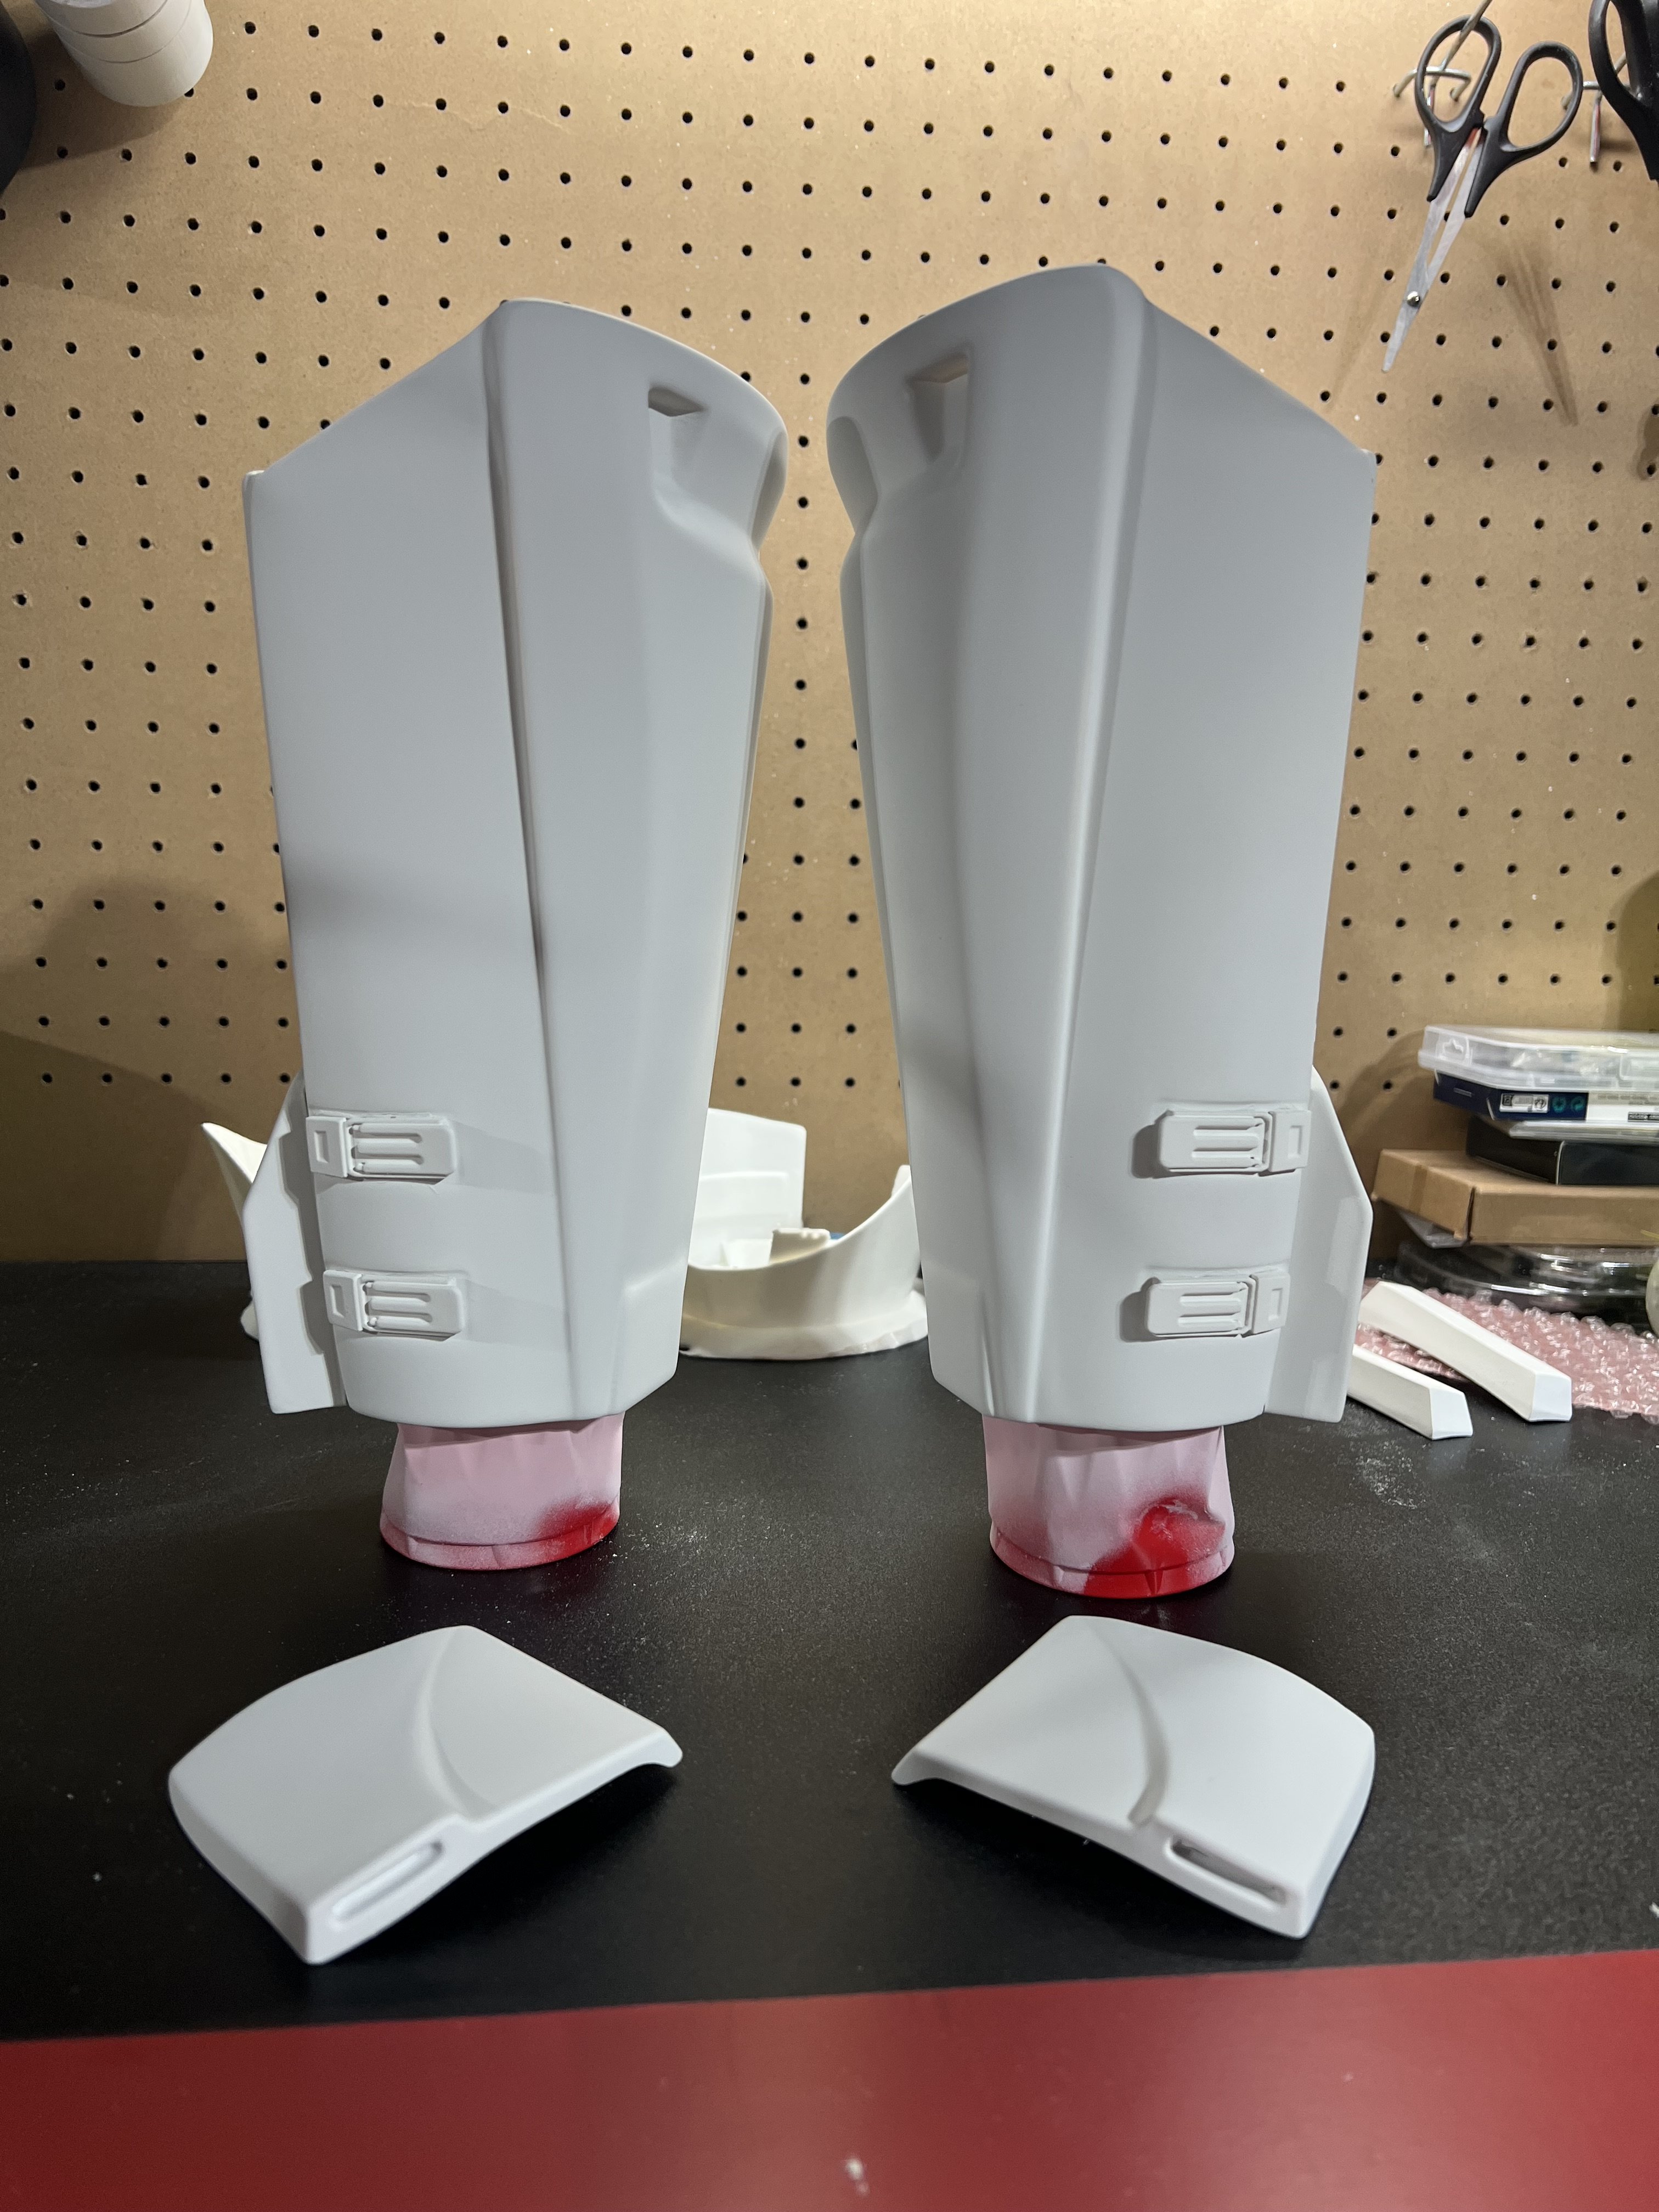
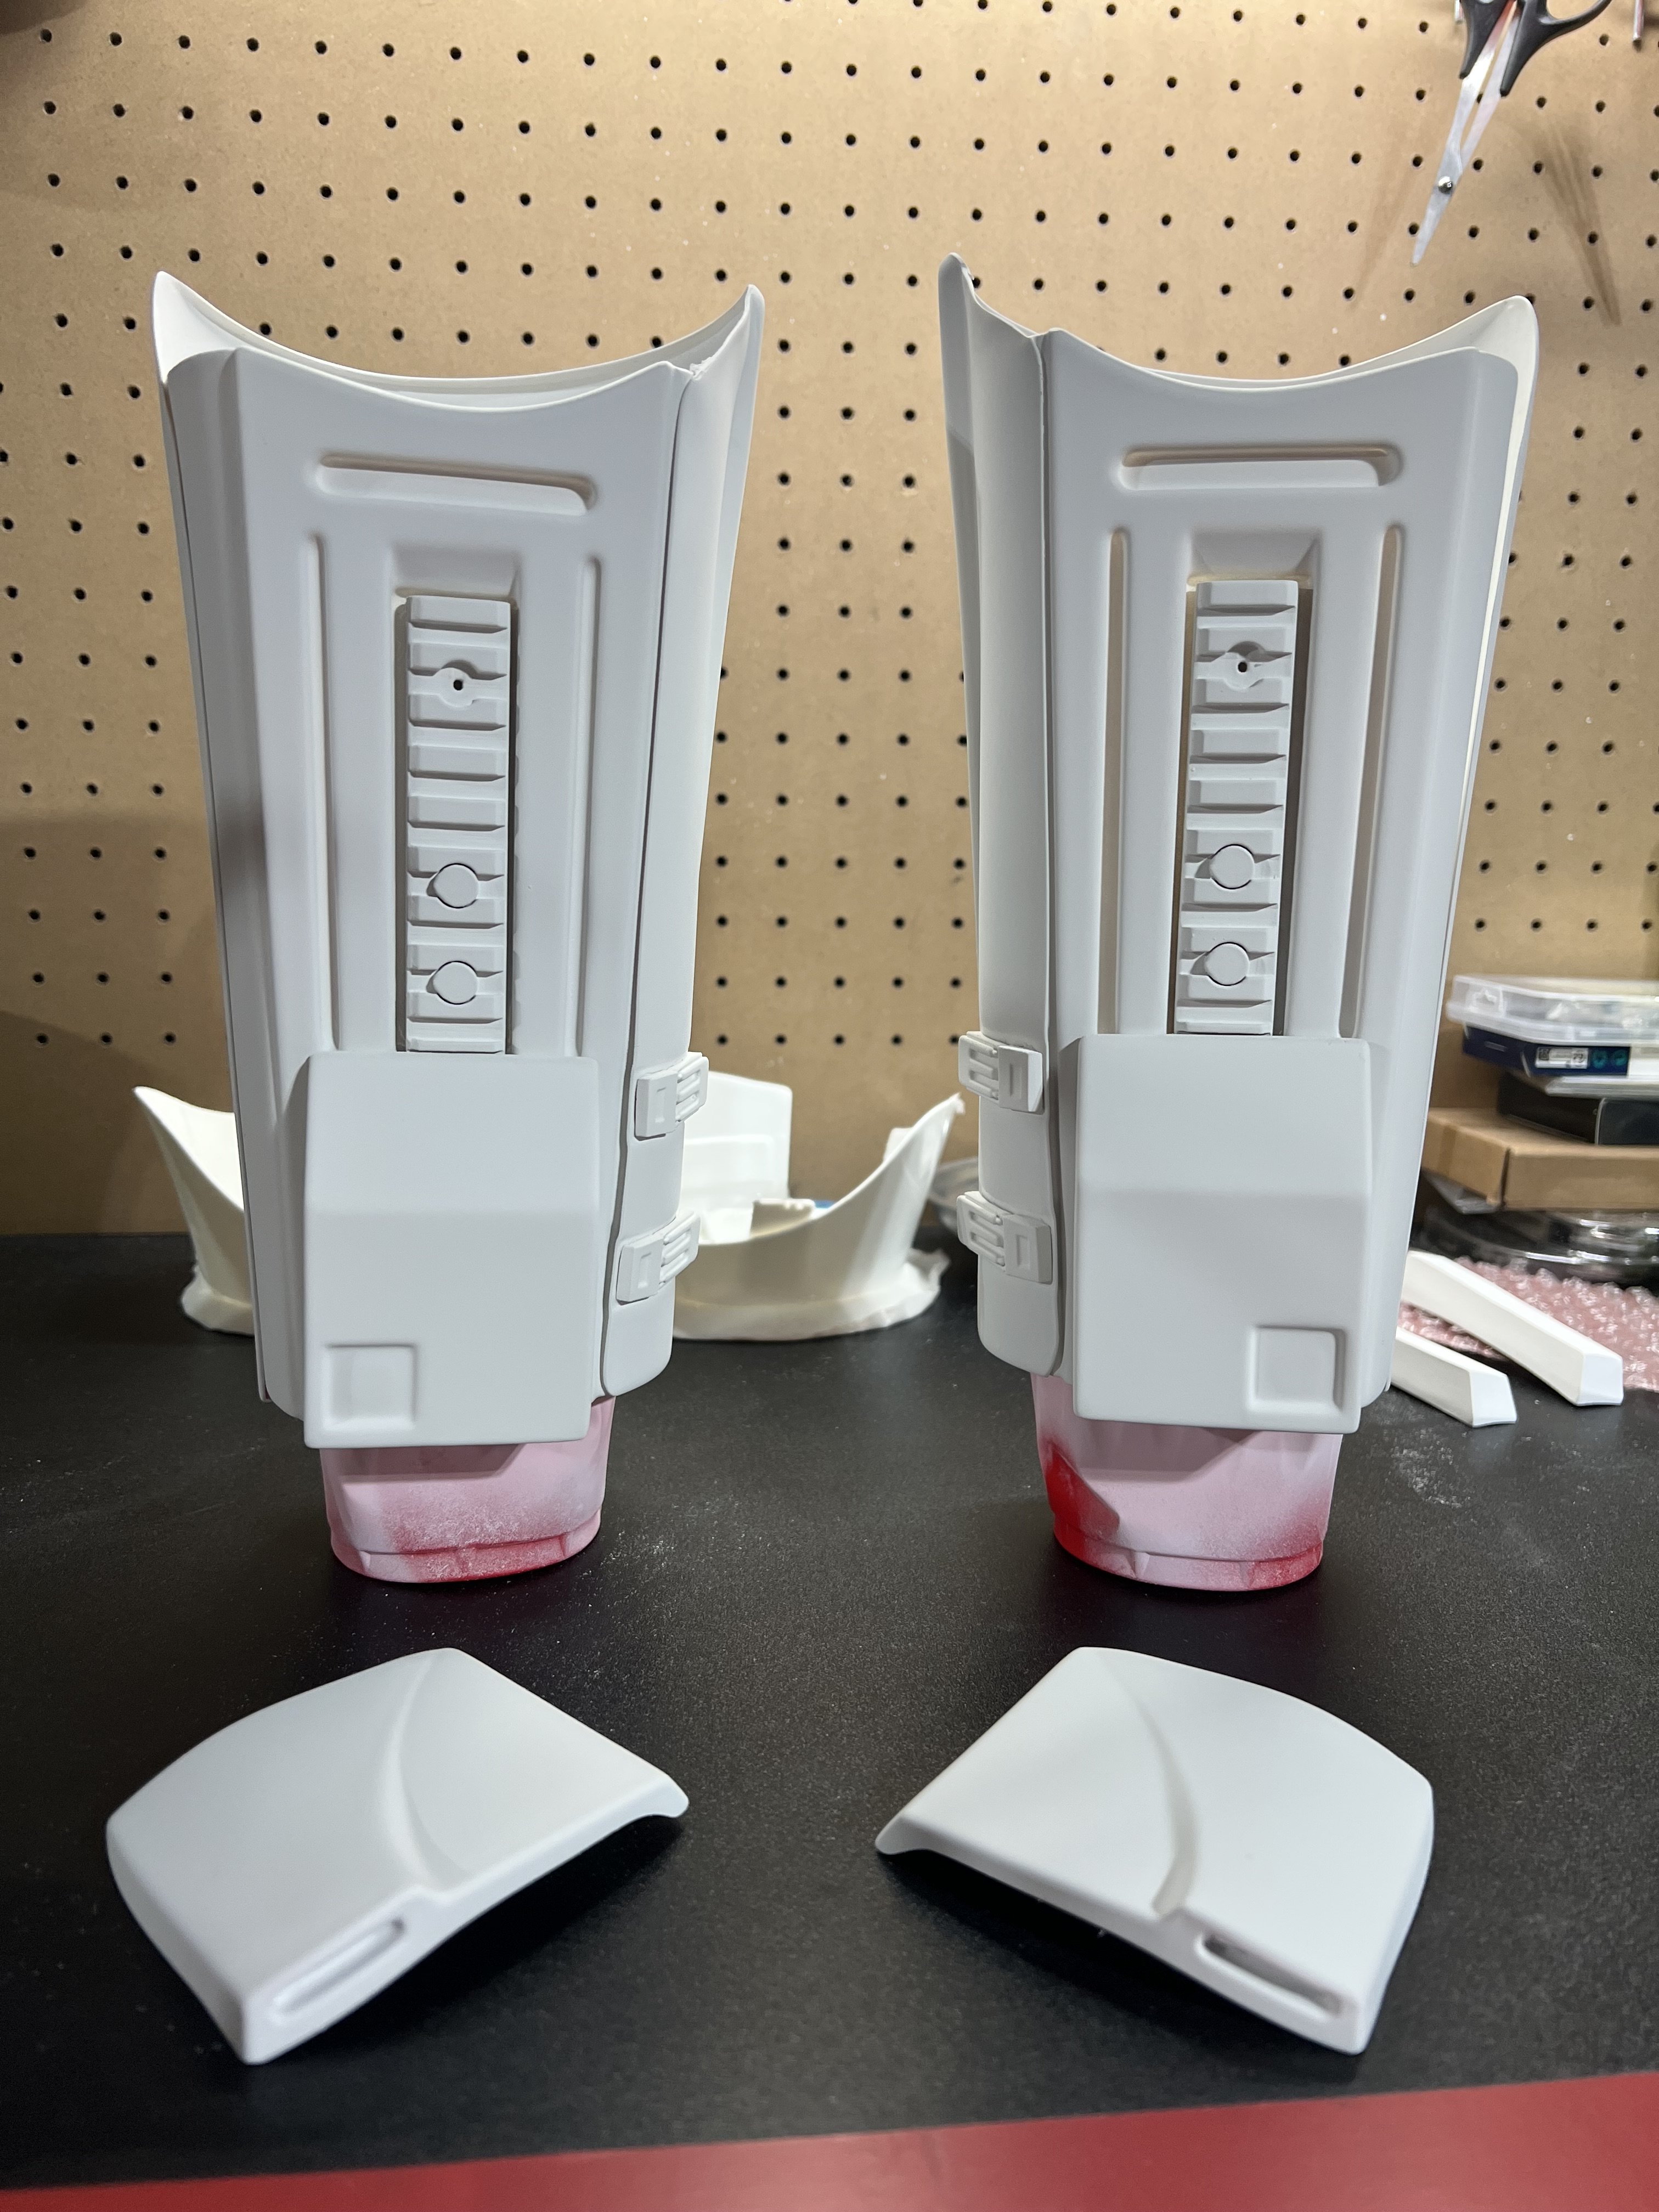
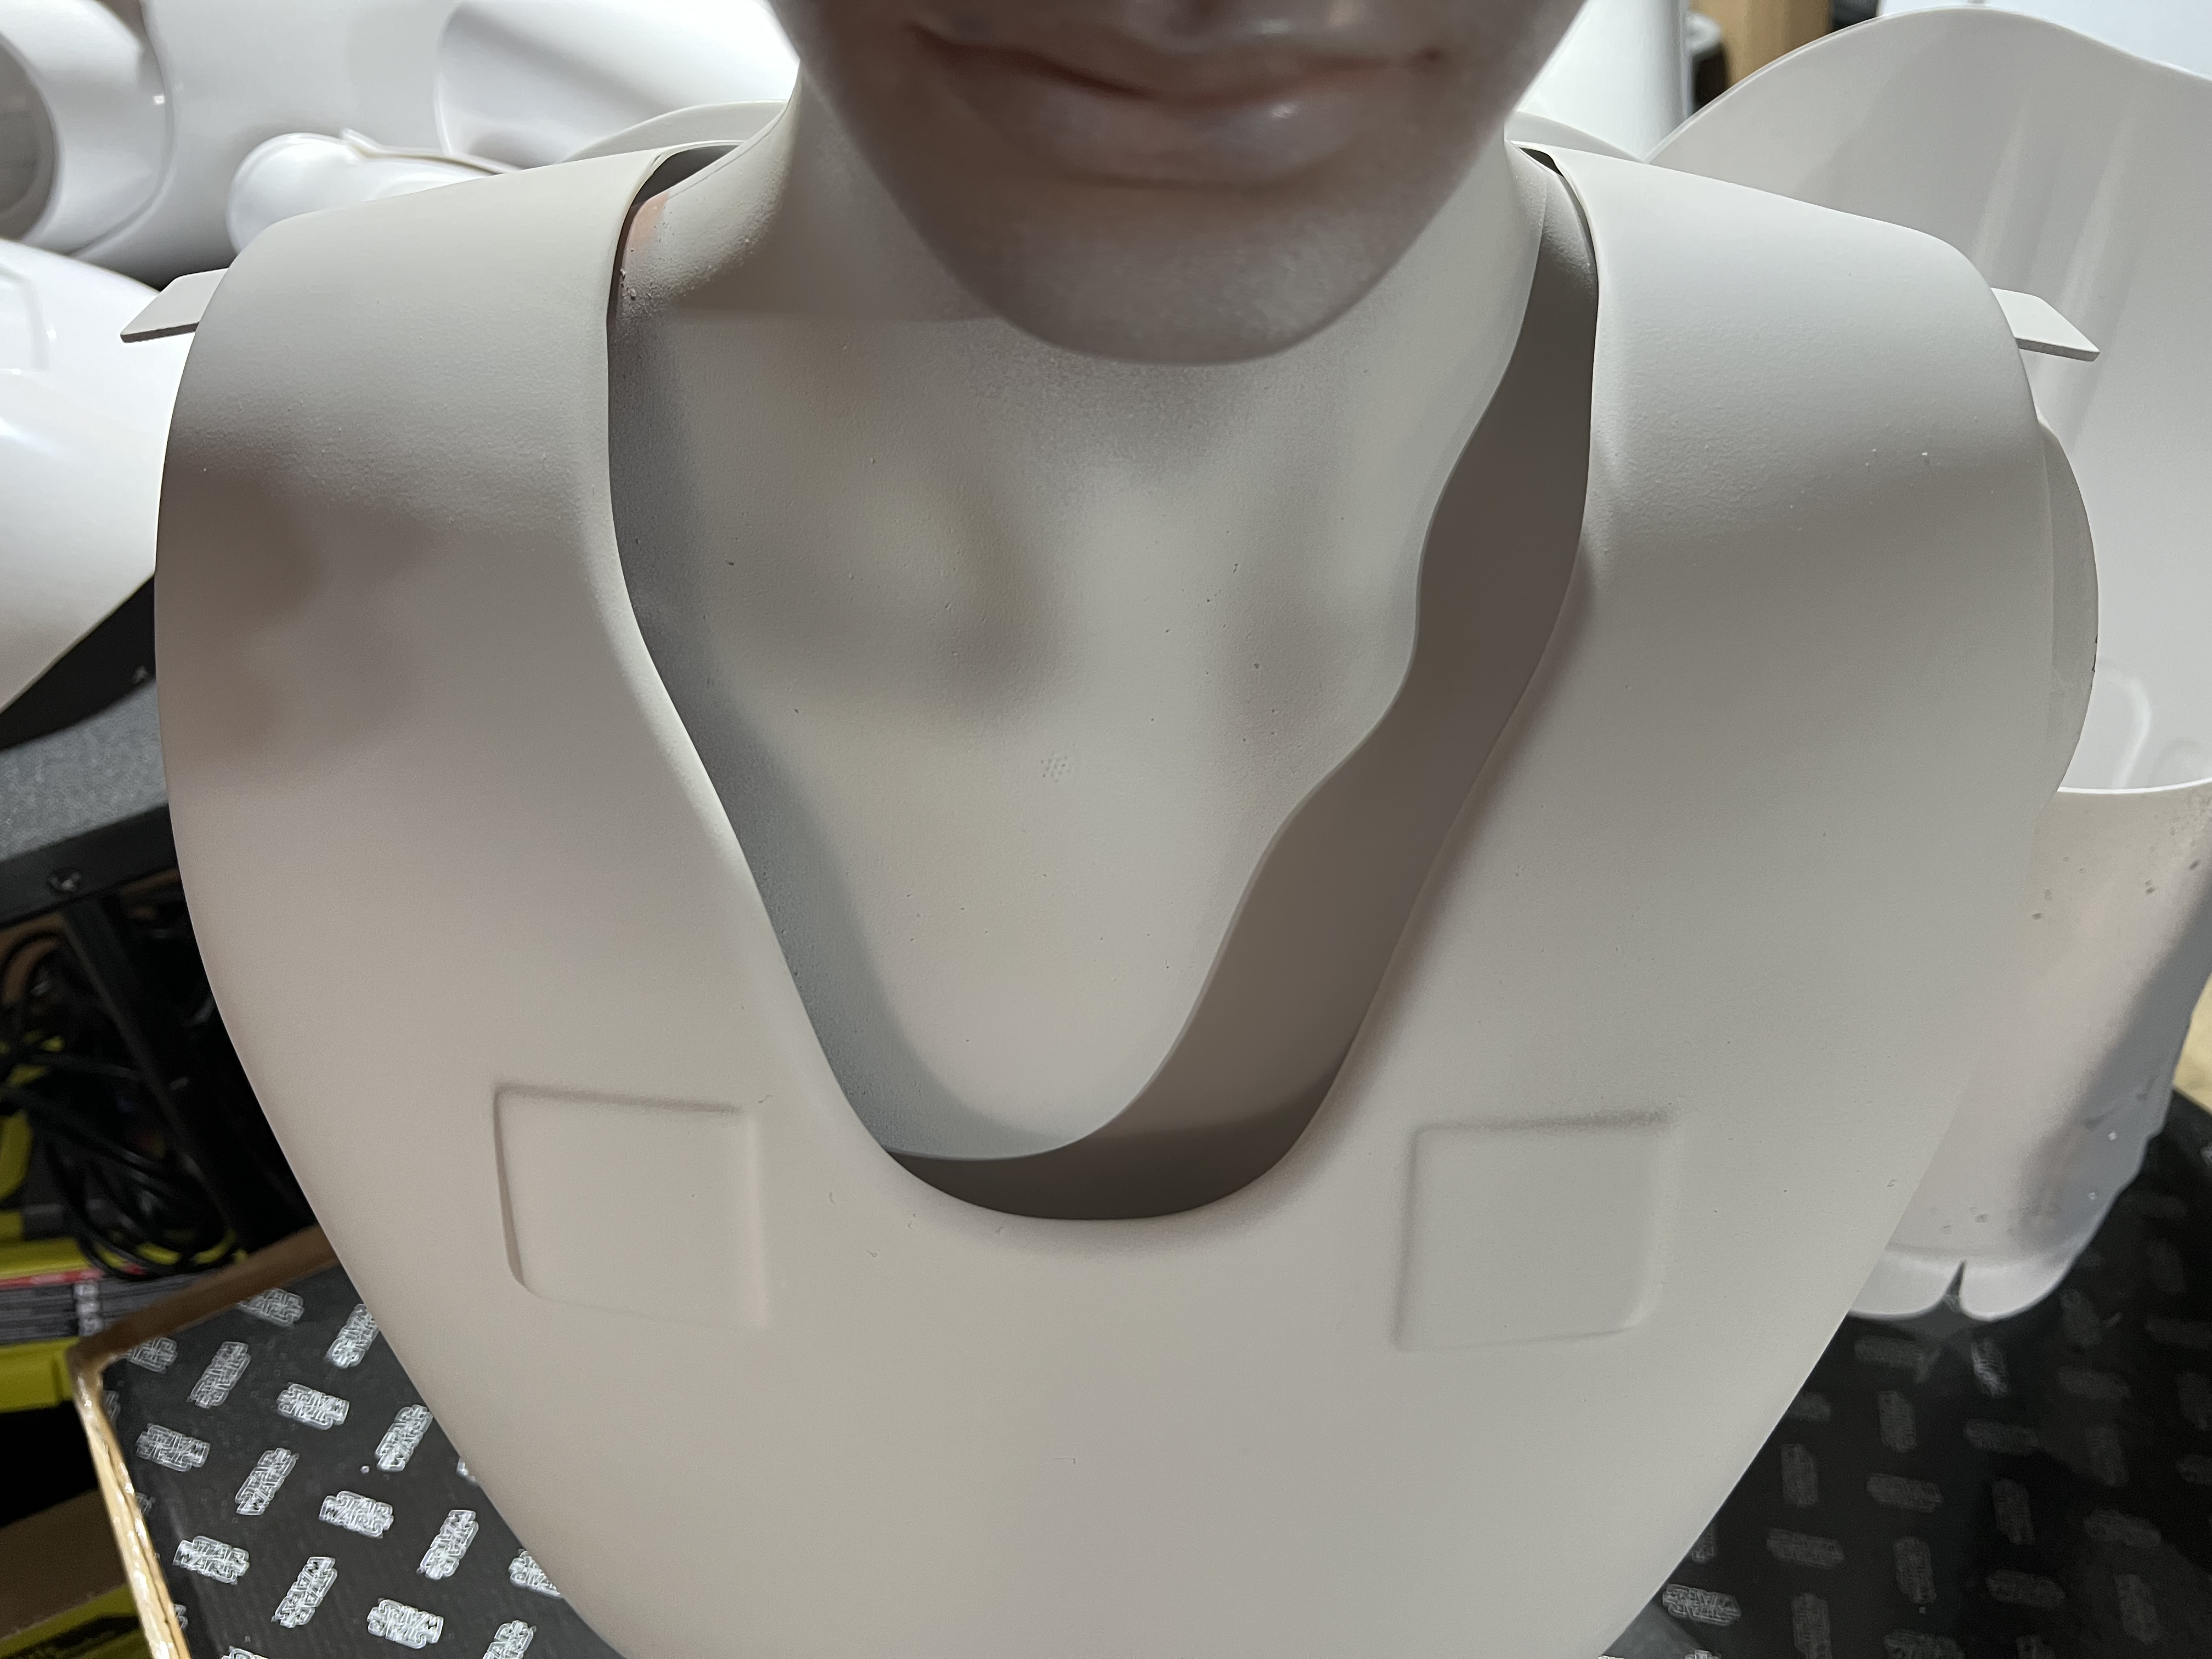
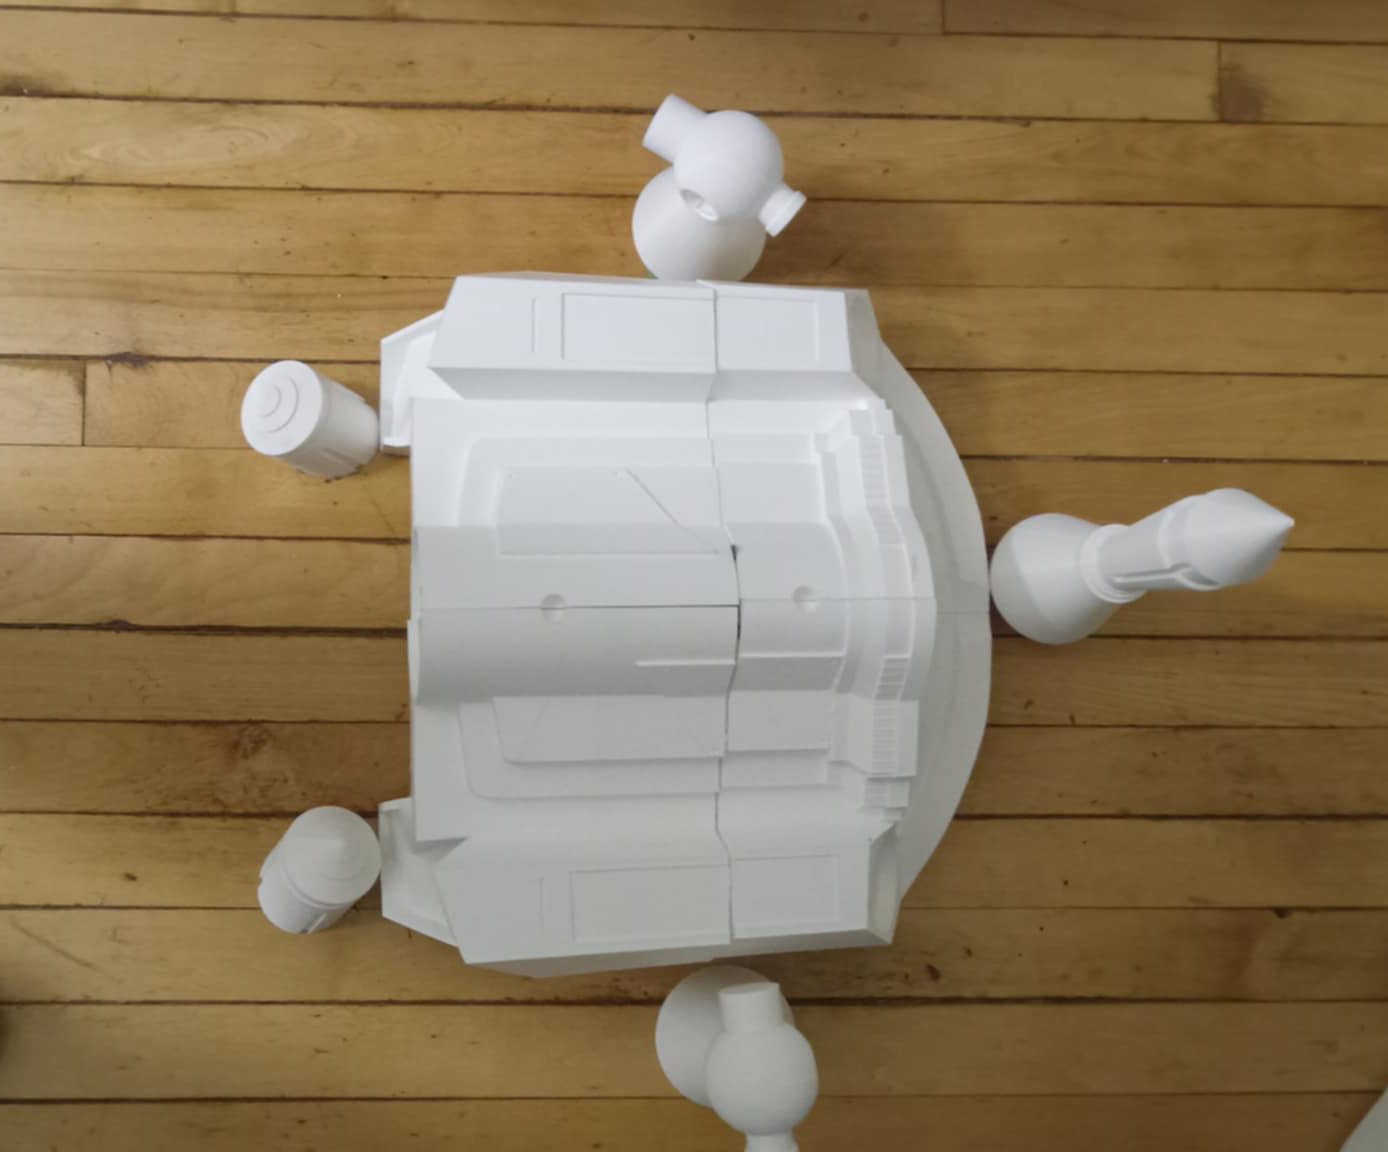
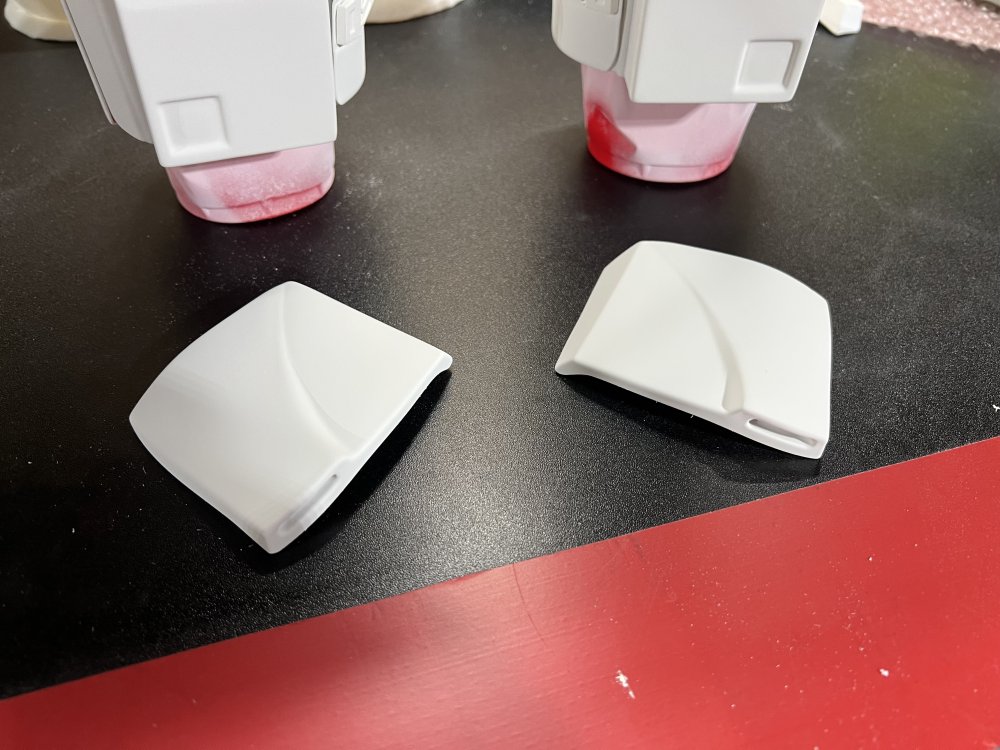
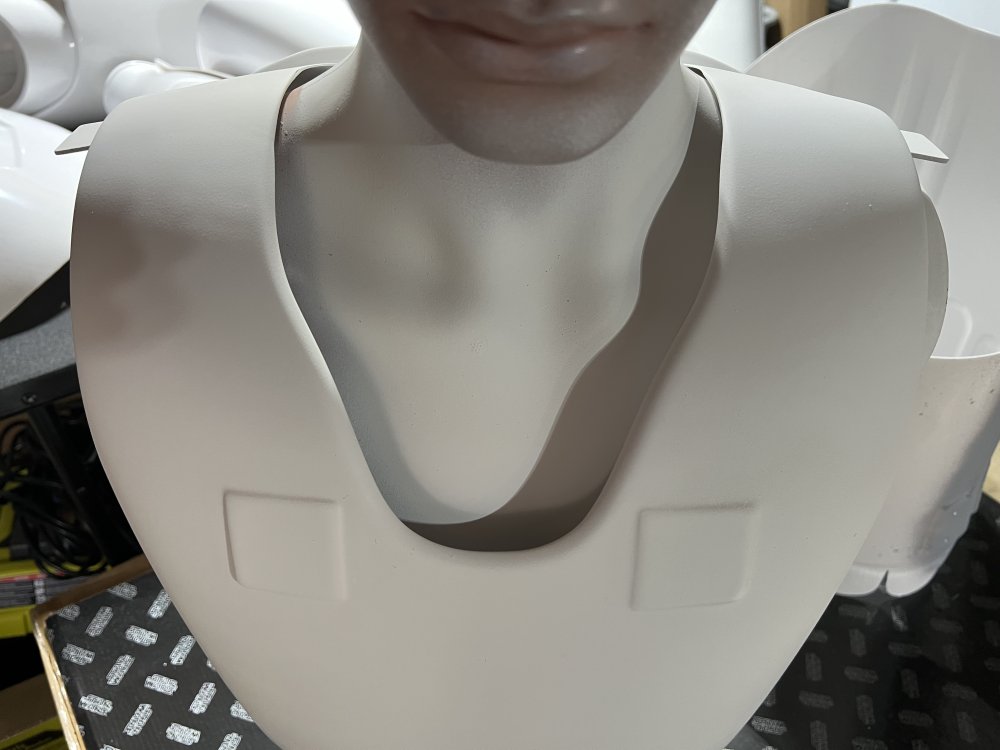
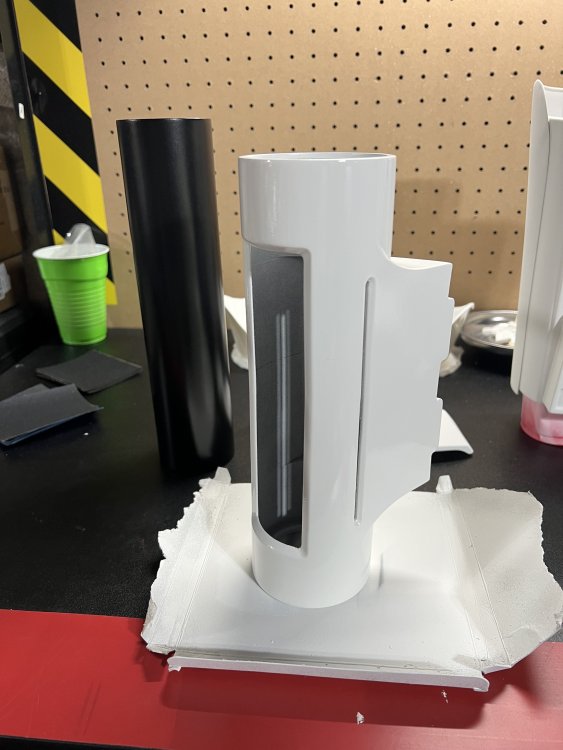
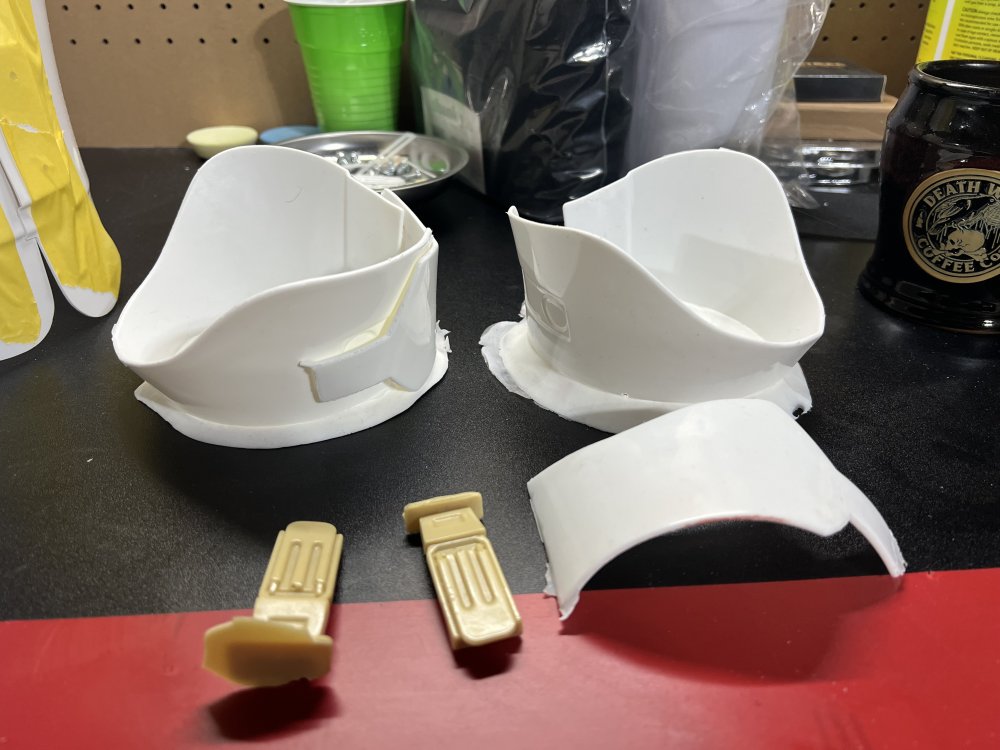
So I hit a bit of a stall due to other commitments and some painting issues, but starting to pick up progress again. I completed the assembly of the forearms with the accurate TLJ shape and 3D printed Picatinny rails. These are primed and ready for paint along with the hand plates: I also installed the metal shoulder support tabs on the yoke for the Level 3 requirement: And I completed the paint and finish on the more accurate 3D printed thermal detonator, again to Level 3 standards. I’ll line the interior with neoprene once the paint cures and before mounting to the backplate: Up next is finishing the seam fill on the abdominal section, primer, paint and assembly and then shifting focus to be lower body armor parts. More to come.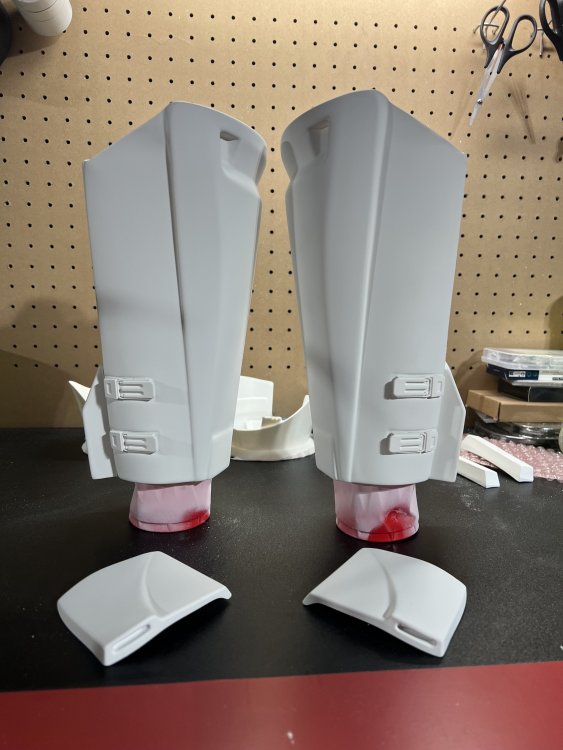


-
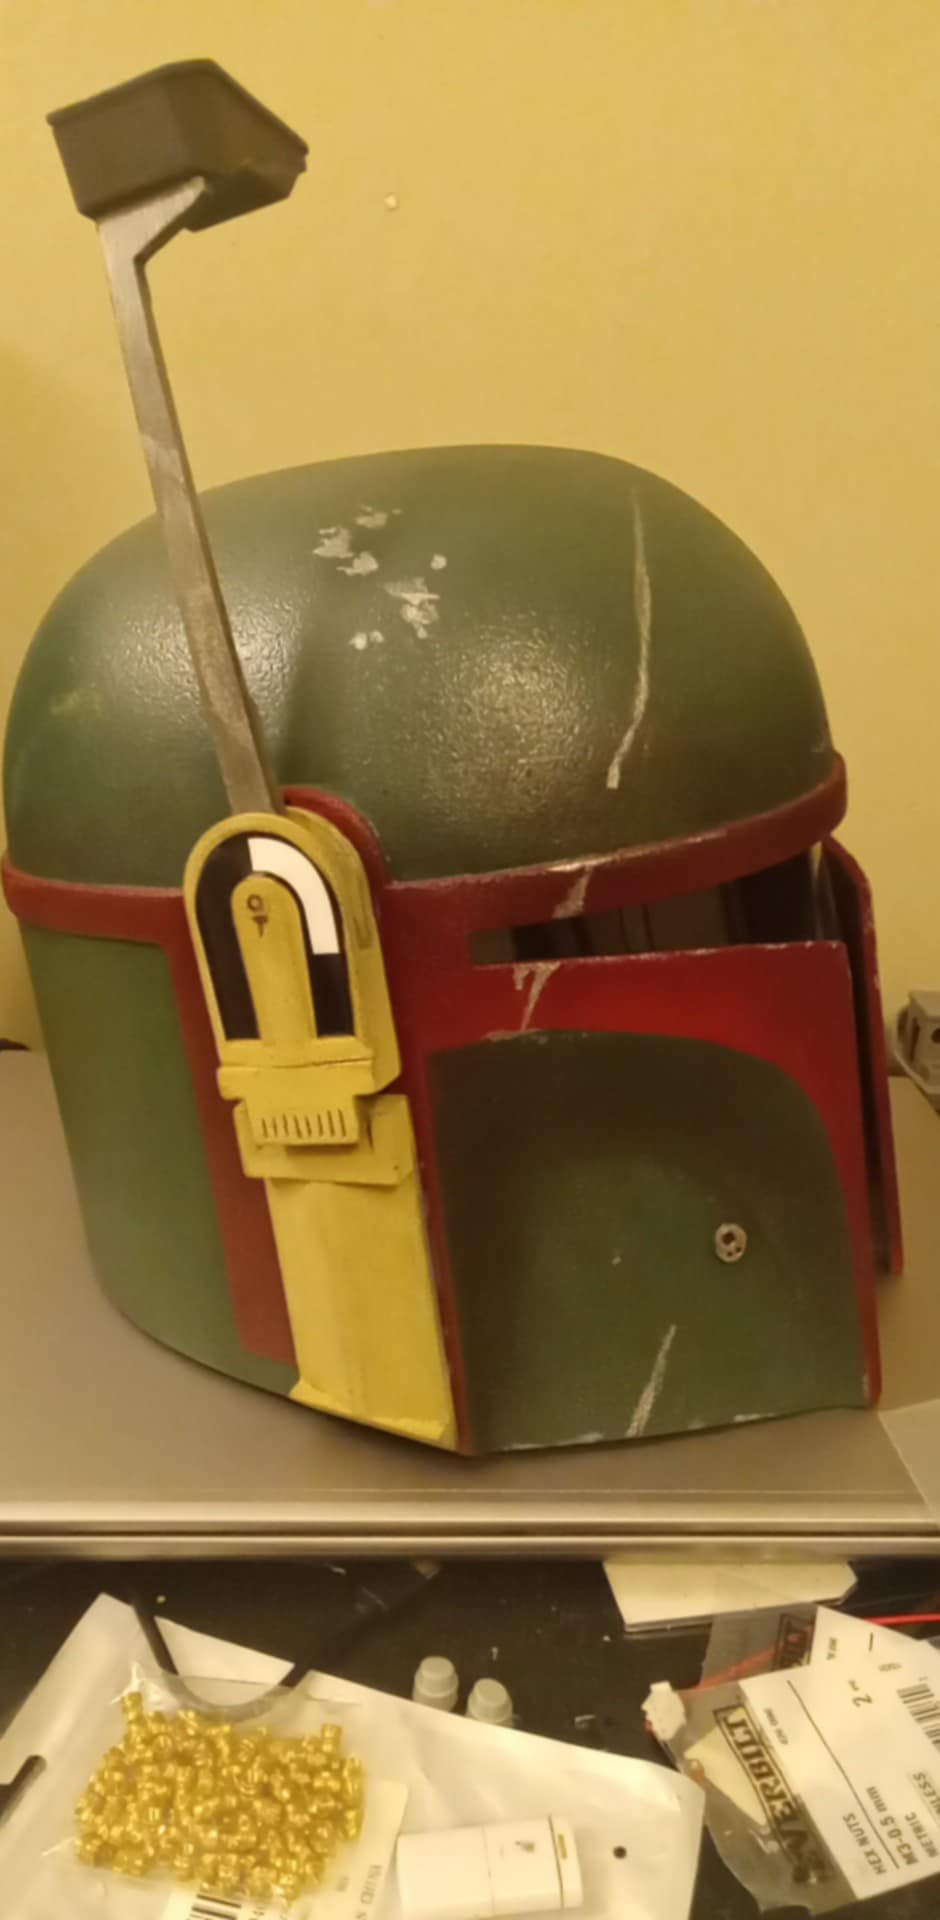
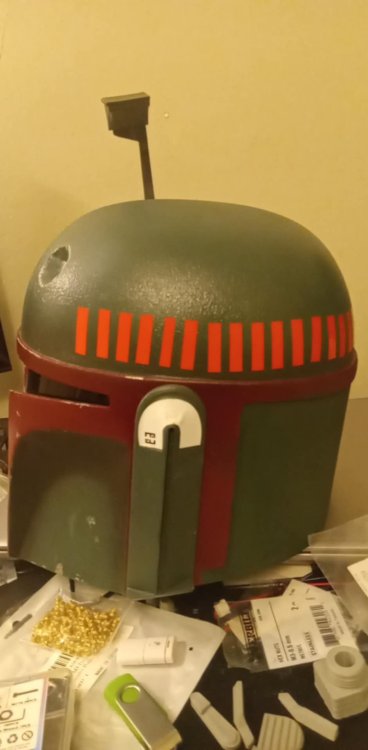
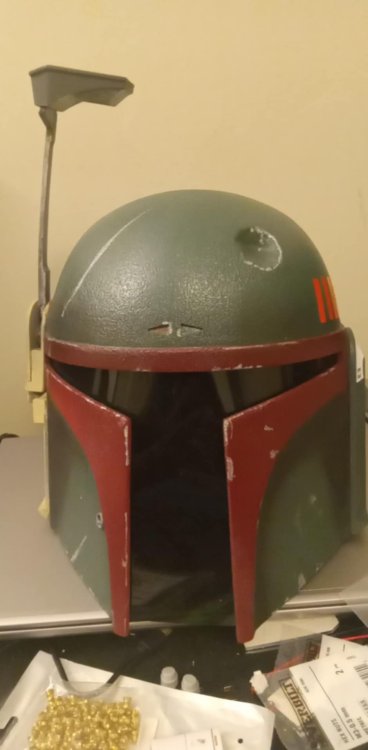
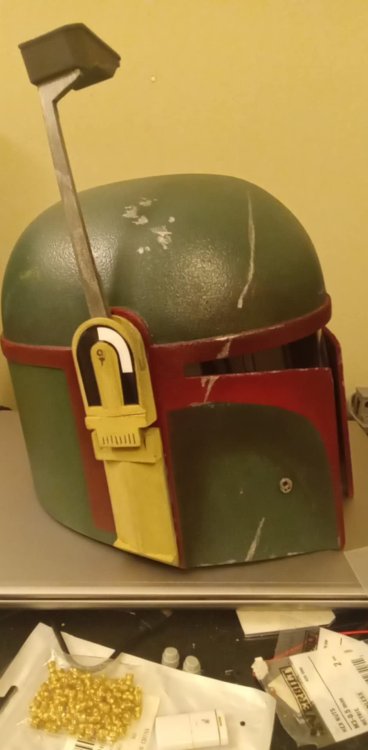
So right off the bat, if you’re going for Boba Fresh and the S2 CRL, the helmet will not pass. It’s a RotJ style model with a Boba Fresh paint. There are subtle but significant differences in the helmet called out in the CRL that are judged for basic approval including the dent and the turn signals: The helmet, including its shape, proportions, details and greeblies, is not an OT-style Boba Fett helmet but is true to The Mandalorian series version. The dome features the iconic dent but is noticeably smaller than the ROTJ Hero dent, in the forward-left section of the helmet. There are 2 “turn signal” details above the band in the front of the helmet that are noticeably smaller and farther apart from each other than what is seen in the ROTJ Hero version. The left-facing turn is painted bright red, and the right-facing turn is dark blue. I haven’t looked deeper yet as the helmet is a pretty big starting point… P.S. Not to pile on, but the jet pack is also the wrong design for this version and the belt would not pass muster. Unfortunately, you’re going to need some significant changes to align with your goal. i would strongly encourage you to step back, carefully review the relevant CRL, and start working from that road map and keep us posted here on a regular basis as you continue.
- Last week
-
WIP Boba Fett: The Book of Boba Fett
Backpacks Got Jets replied to EColson6's topic in Costume Building
Which CRL are you using so we can look at it. The only active Boba Fresh CRL is the Mando S2: https://databank.501st.com/databank/Costuming:BH_Boba_MandoS2_Repaint If your end game is to get admission into the 501st you'd have to follow this one. @Swiftcloud could be a great resource on this build. -
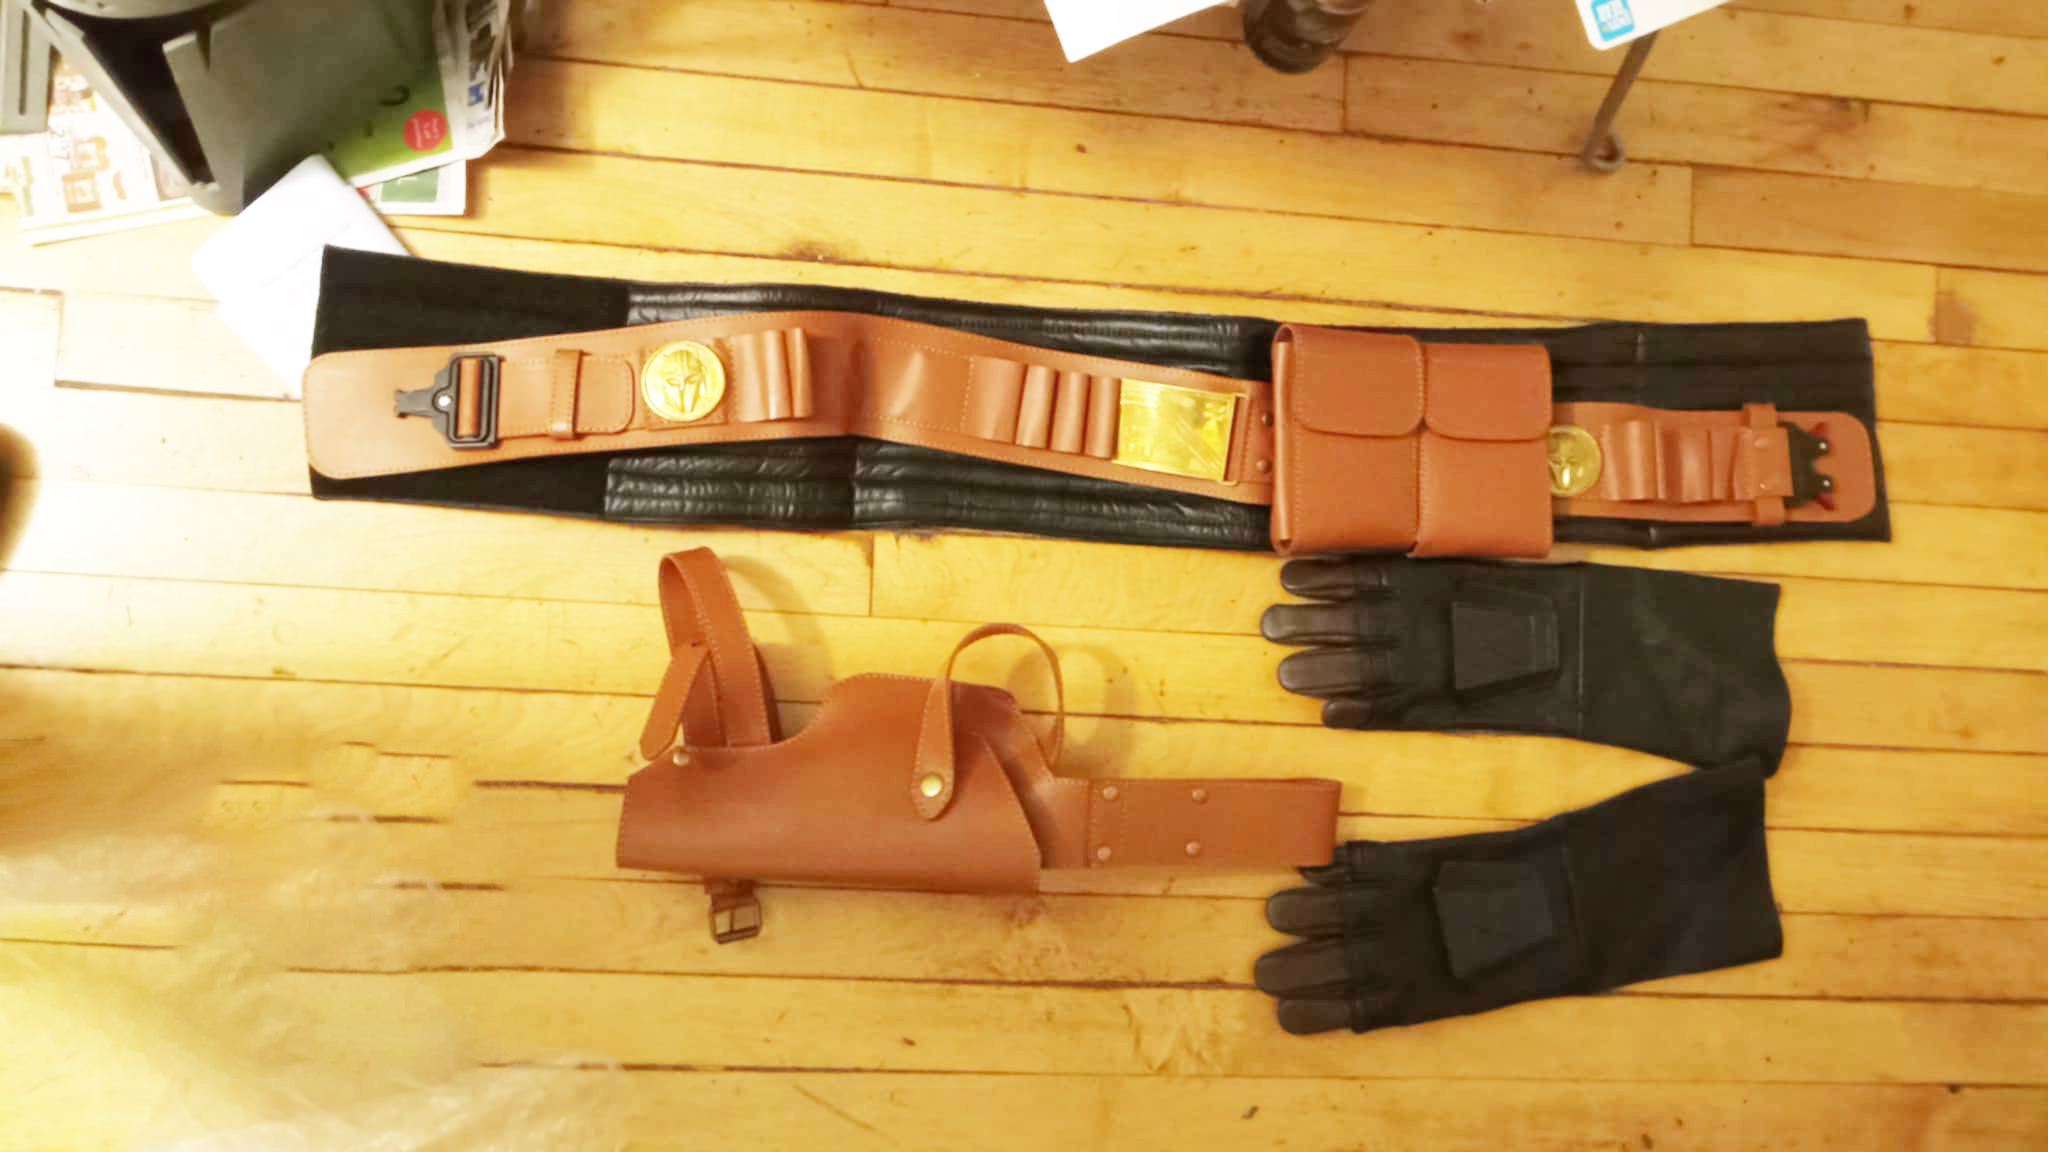
Small update: Helmet is painted and 100% completed Torso buttons are all painted White shoulder straps are attached Detonator is constructed Belt is 99% done, just need to attach the holster All that is left to do is put together the straps that connect the bicep/forearm to the shoulders and the belt that'll hold up the thighs. Shooting for Wednesday at the latest to submit approval photos.
-
Here is what I have so far.


-
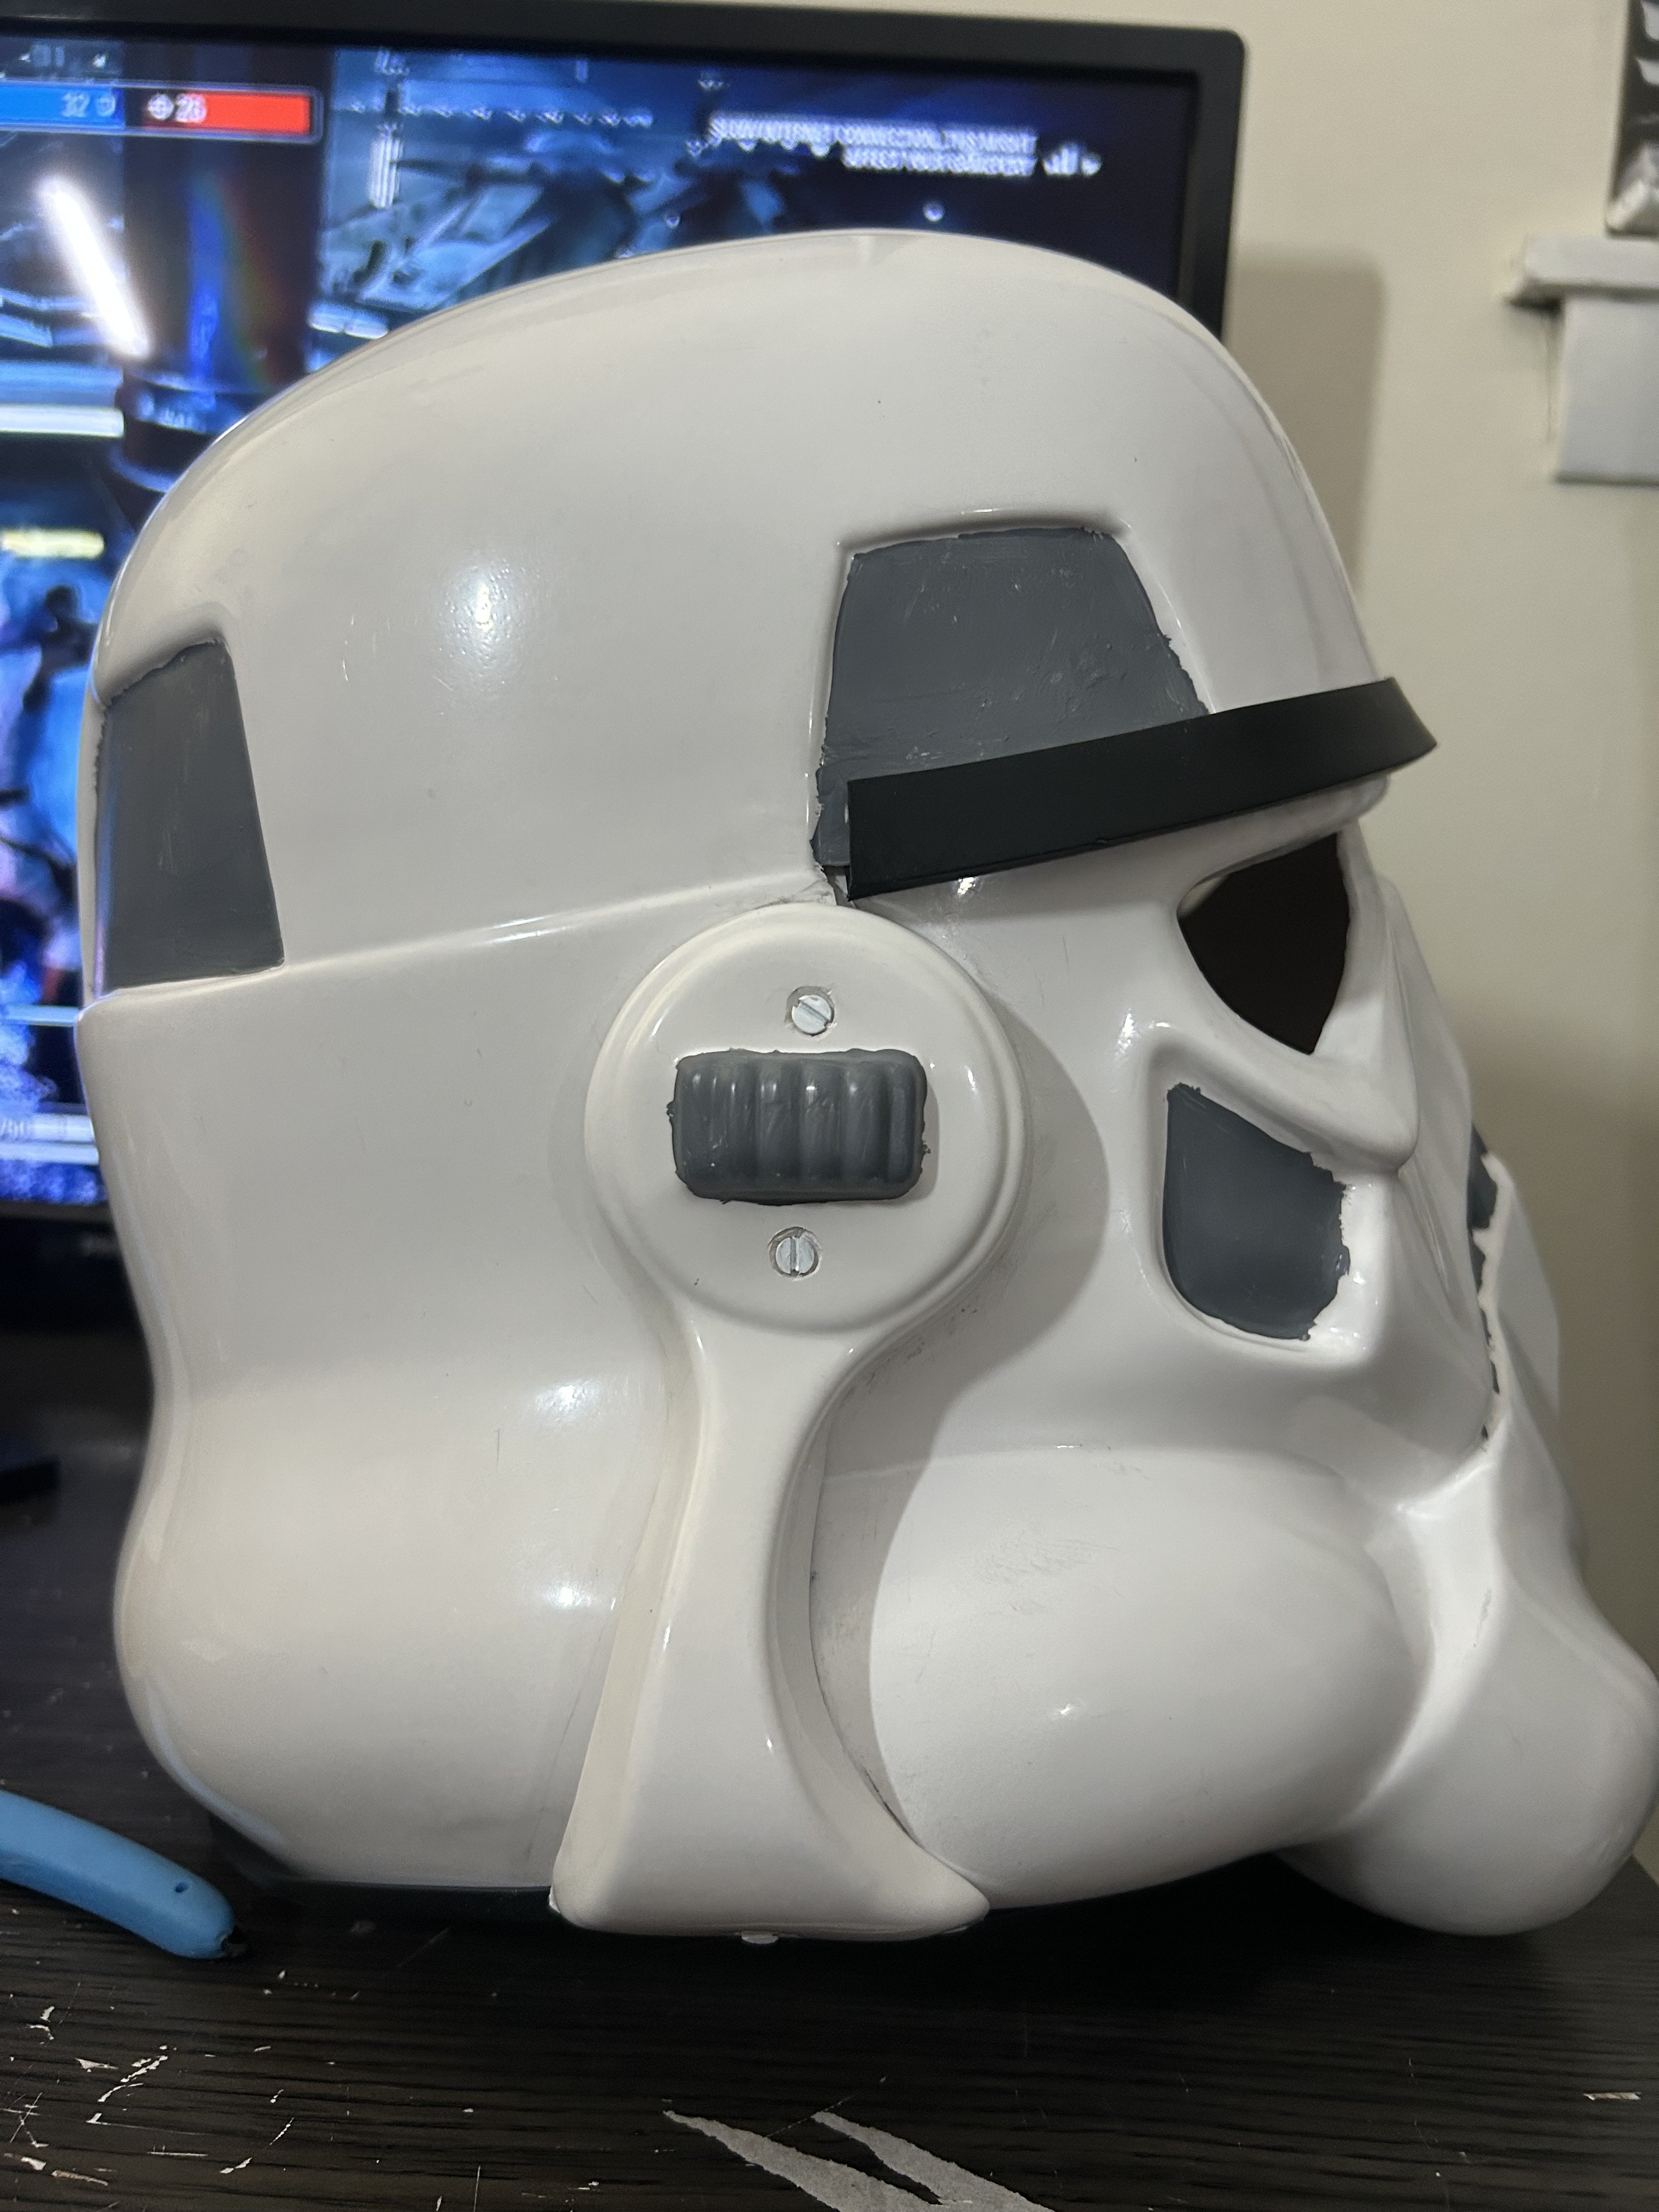
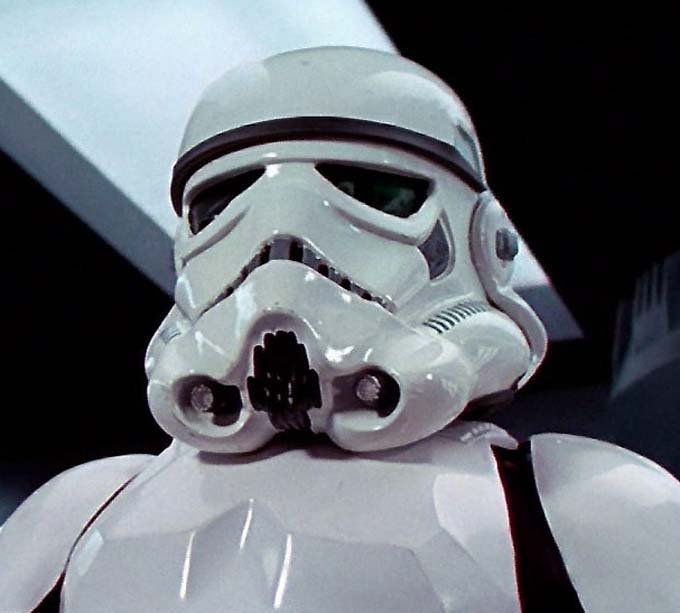
Put the first coat of paint for the trapezoids, frown, and vocoder along with the aerators. Letting it dry fully then I can outline and add the black lines. Only thing then will be to add the visor and mesh to the teeth.

-
Yep, you’ve got it! The CRL says “numbering 9 to 16 per side,” which means you’re good as long as each side has between 9 and 16 stripes. That range is based on what’s seen on screen and there’s some variation in the original helmets, so the CRL allows for that. Traditionally, stunt helmets tend to have around 13–16 stripes, while hero helmets usually sit around 9–11. TL;DR: Pick whatever looks best to you, between 9 and 16 per side, and make both sides match. If you're going for an in-between “sweet spot,” 13 stripes is a popular and very safe choice.
-
On the CRL it says for the tube stripes are "numbering 9 and 16 per side". I'm assuming that means there can be as 9 stripes per side, 10 per side, 11, etc... upwards to 16?
-
Looking good so far! You’re definitely on the right track. For holding up the biceps, both methods work, but I also lean towards the short elastic strap from the shoulder bell to the bicep. It’s simple, keeps the bicep from flopping around, and gives you more control than the hook method. Just make sure it’s not too tight or it’ll pull weird when you move. Swapping out the holster straps for undyed leather is the way to go, nice catch there. That’s screen accurate for ANH stunt TKs. On the belt wrapping too far: totally up to you. Some people just add a keeper or extra piece of Velcro to secure the overhang, others trim it down for a cleaner look. If you’ve got the room and don’t mind the extra length, you could leave it but if it bugs you visually, trim and clean up the edge.
-
Small update: Entire torso is strapped together along with the shoulders, just waiting for the strap to dry. Still trying to figure out how to hold up the biceps, I've seen people make hooks that they hang off the shoulder strap but I'm leaning towards running a strap from the shoulder to the bicep similar to what I have for Rex. I replaced the black straps on the holster with undyed versions. Trimmed down the large belt ammo piece, just waiting on the white straps for the boxes to come in tomorrow along with a clip for the belt I'm planning on making to hold up the thighs. My belt is a bit large and wraps around me even in armor about halfway past the velcro. I was thinking of just put another piece at the far end instead of having to trim it down but I'd also like to hear some others opinons on that. Plan for tomorrow is to attach the stomach greebling along with the plastic shoulder straps to the chest. Received my thermal detonator hooks in the mail so that will hopefully be done as well tomorrow. Hoping to paint the helmet/buttons on Friday, just have to go organize my model paints. I'm hoping to have it all together by this weekend and able to submit my photos by next week at the latest!
-
My june and july are crazy so sorry for the delay in another one of these. Hosting and armor party on 7/20. Pool will also be open Topic is for discussion of event. To Sign up/RSVP for this event, please visit the calendar link: Armor Party - 7/20
-
My june and july are crazy so sorry for the delay in another one of these. Hosting and armor party on 7/20. Pool will also be open
- Earlier
-
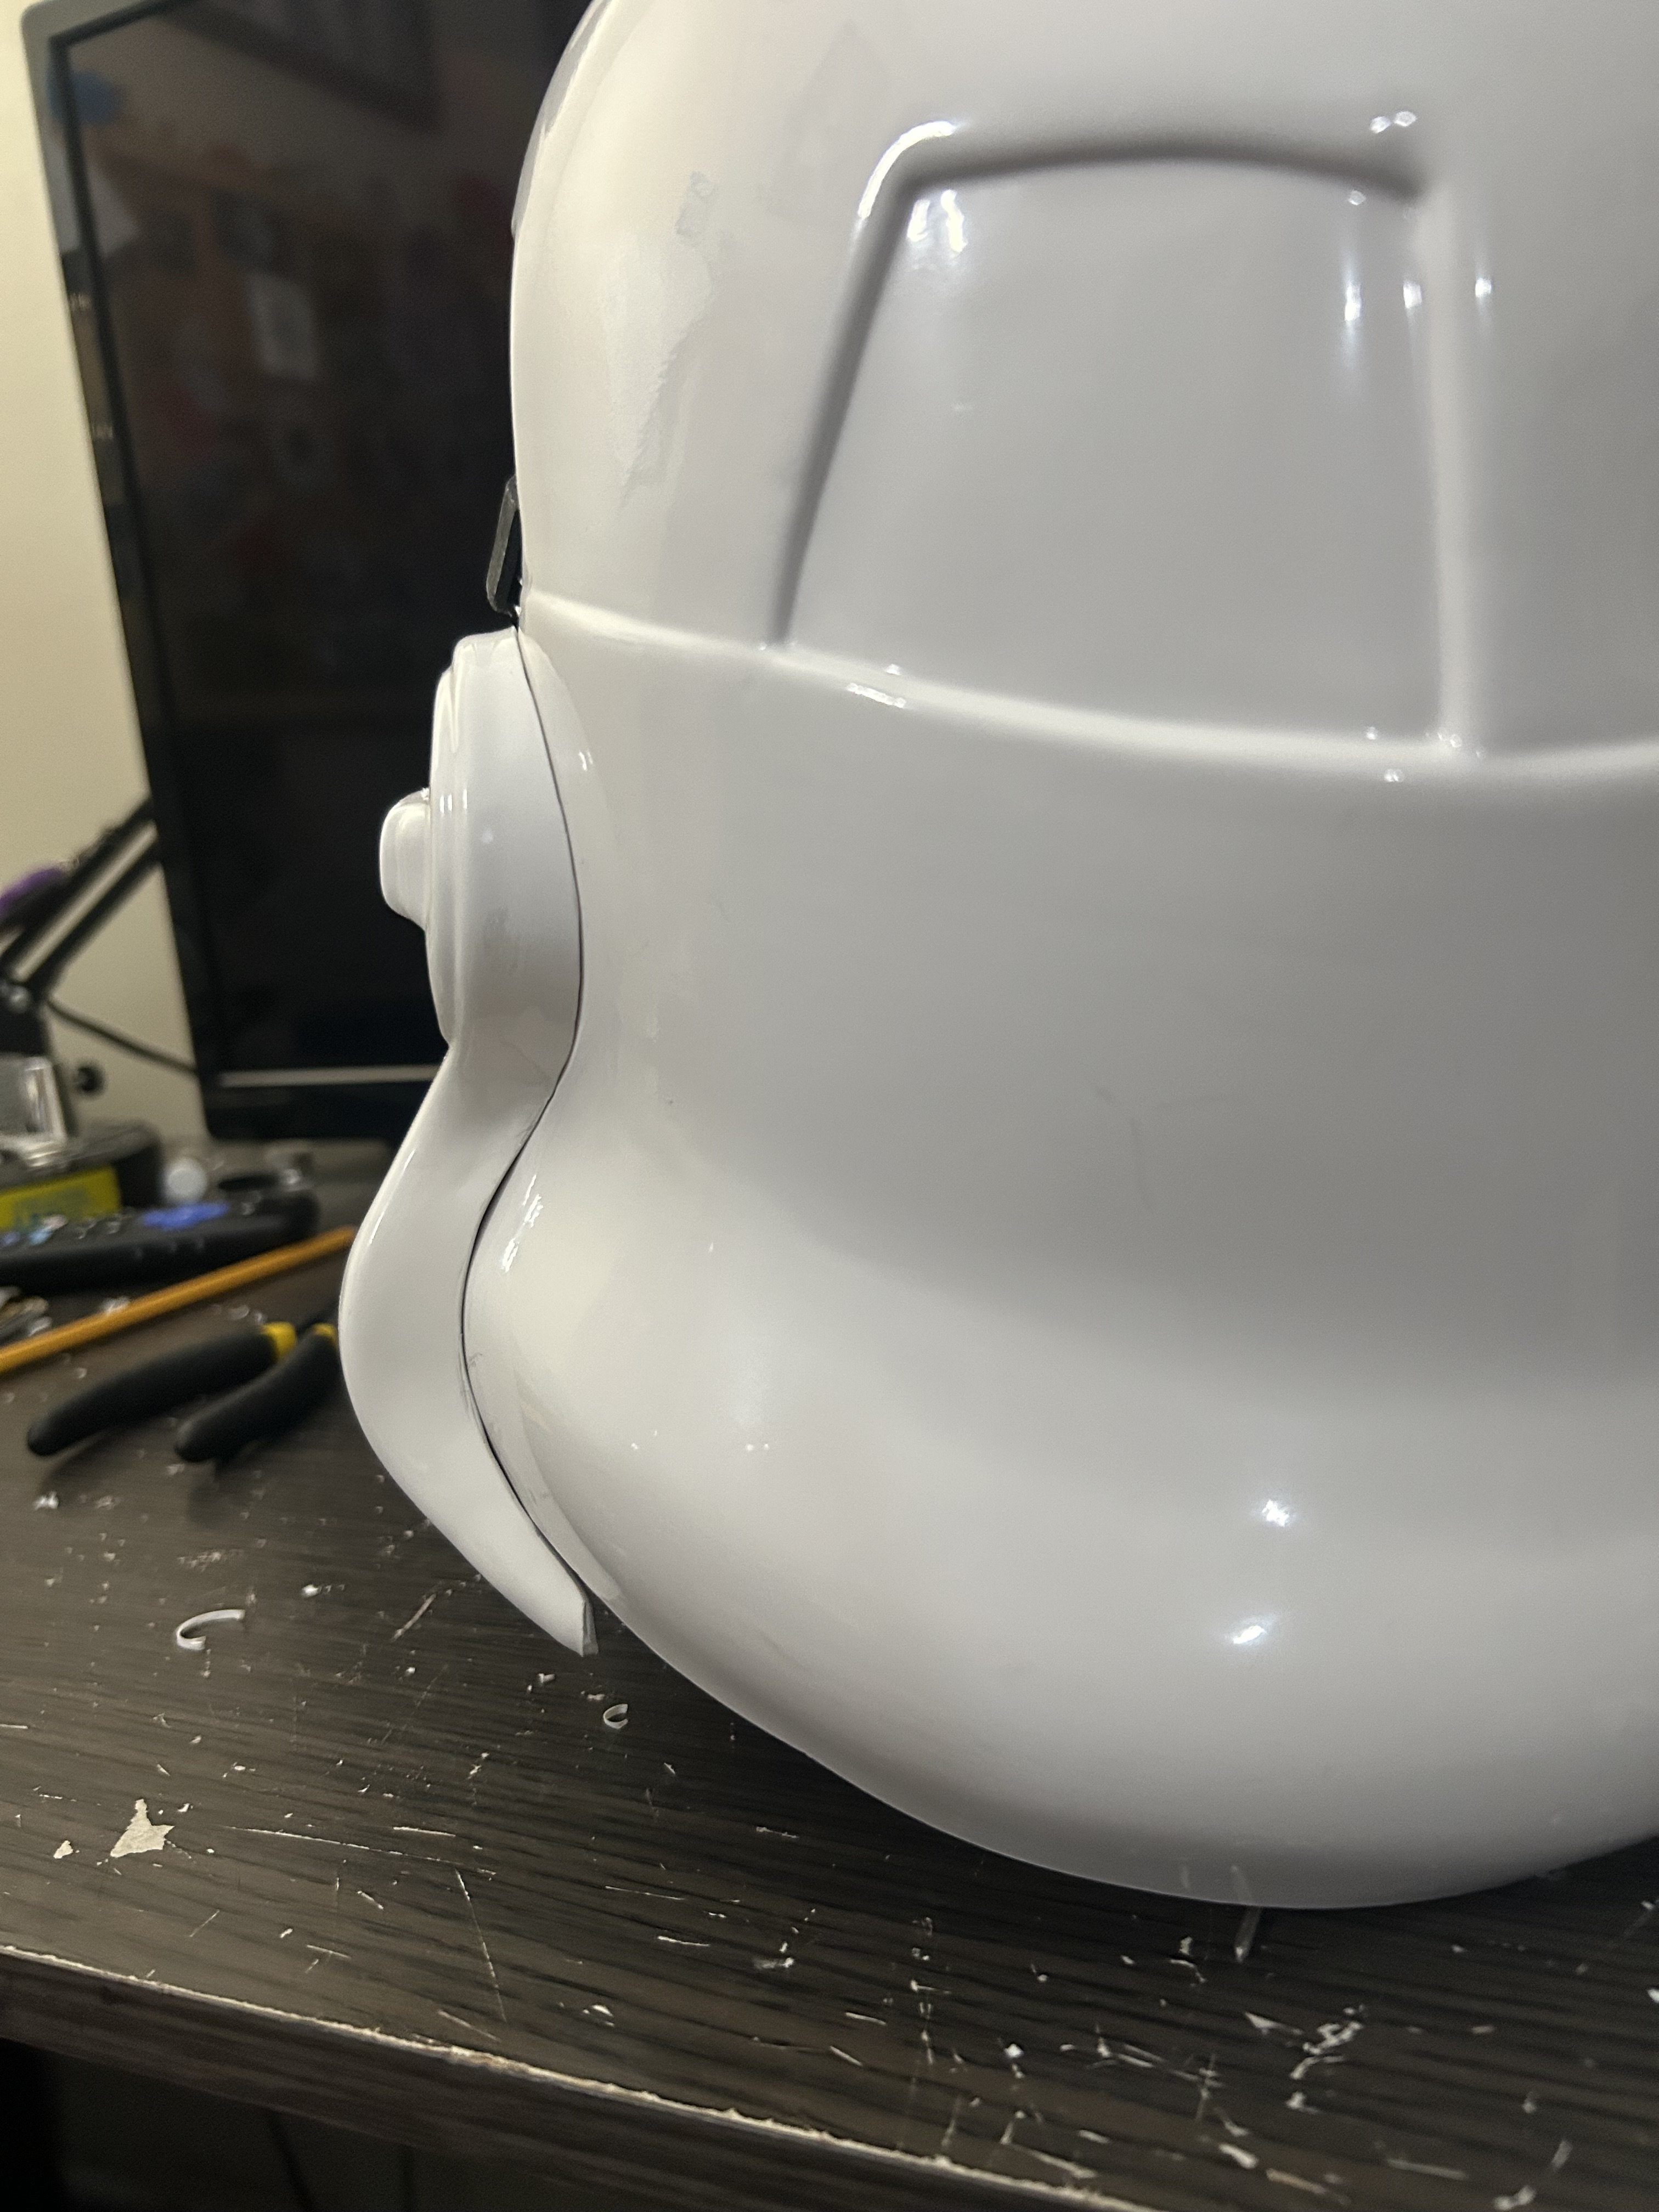
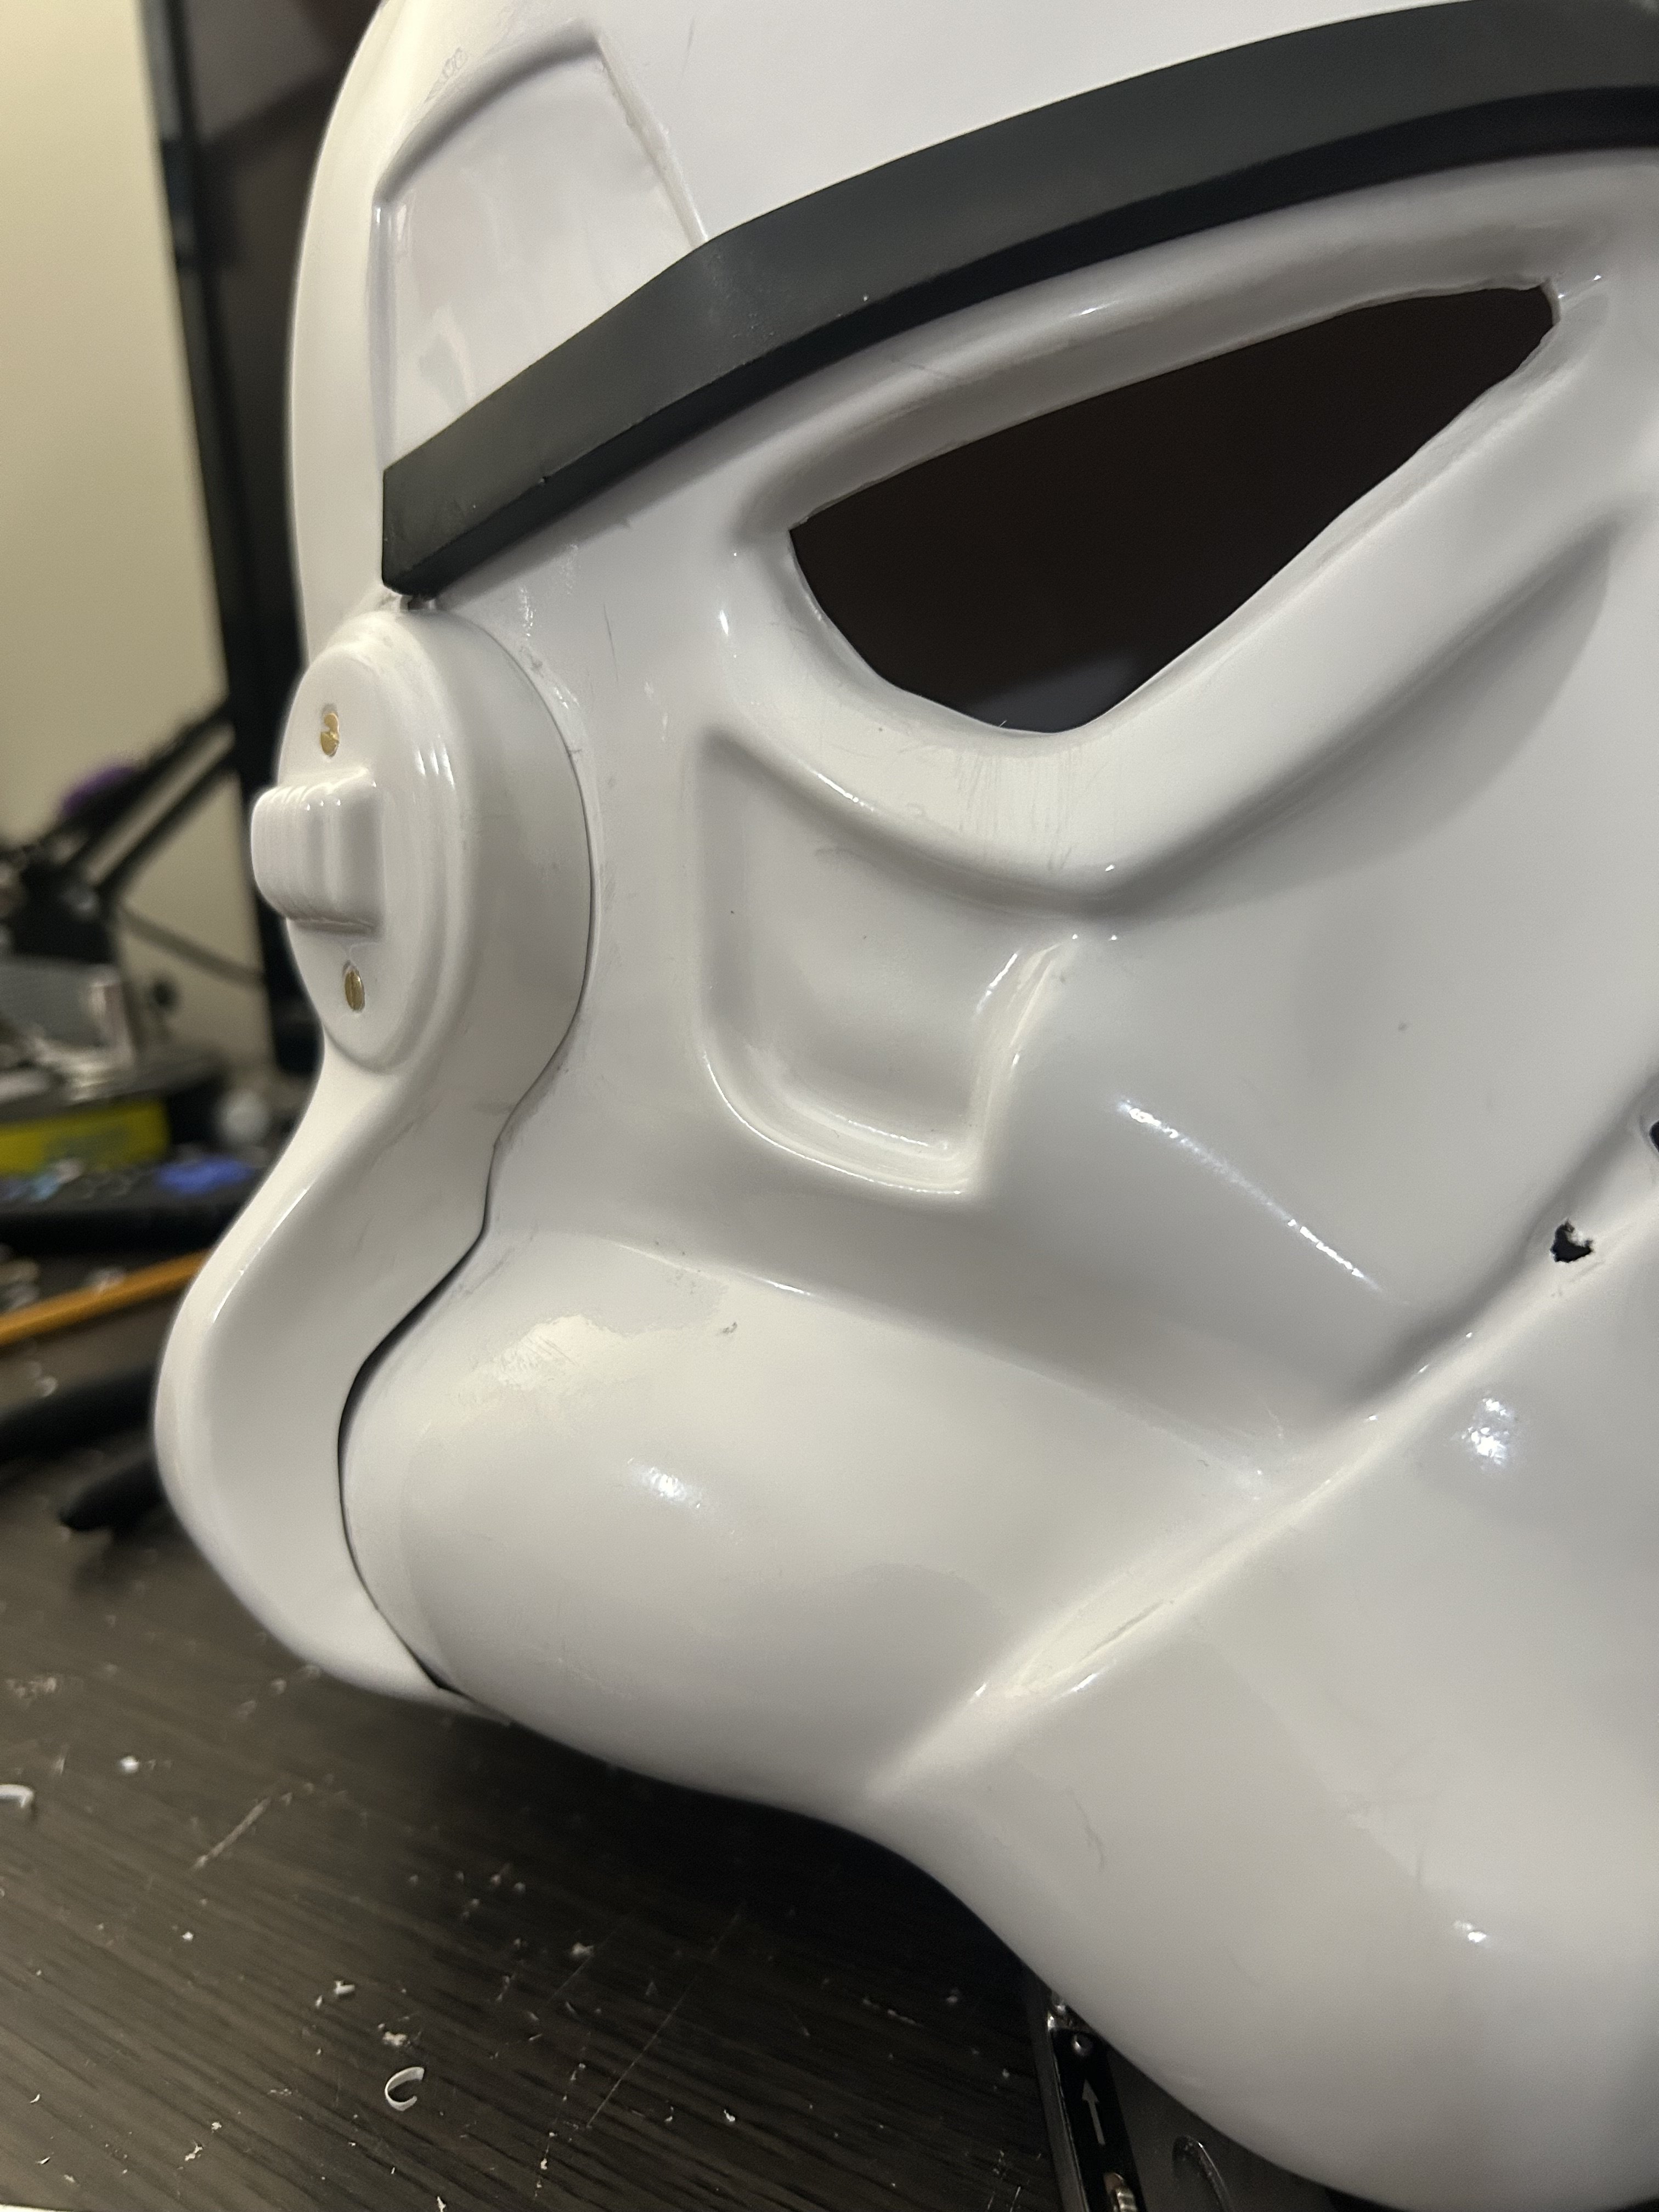
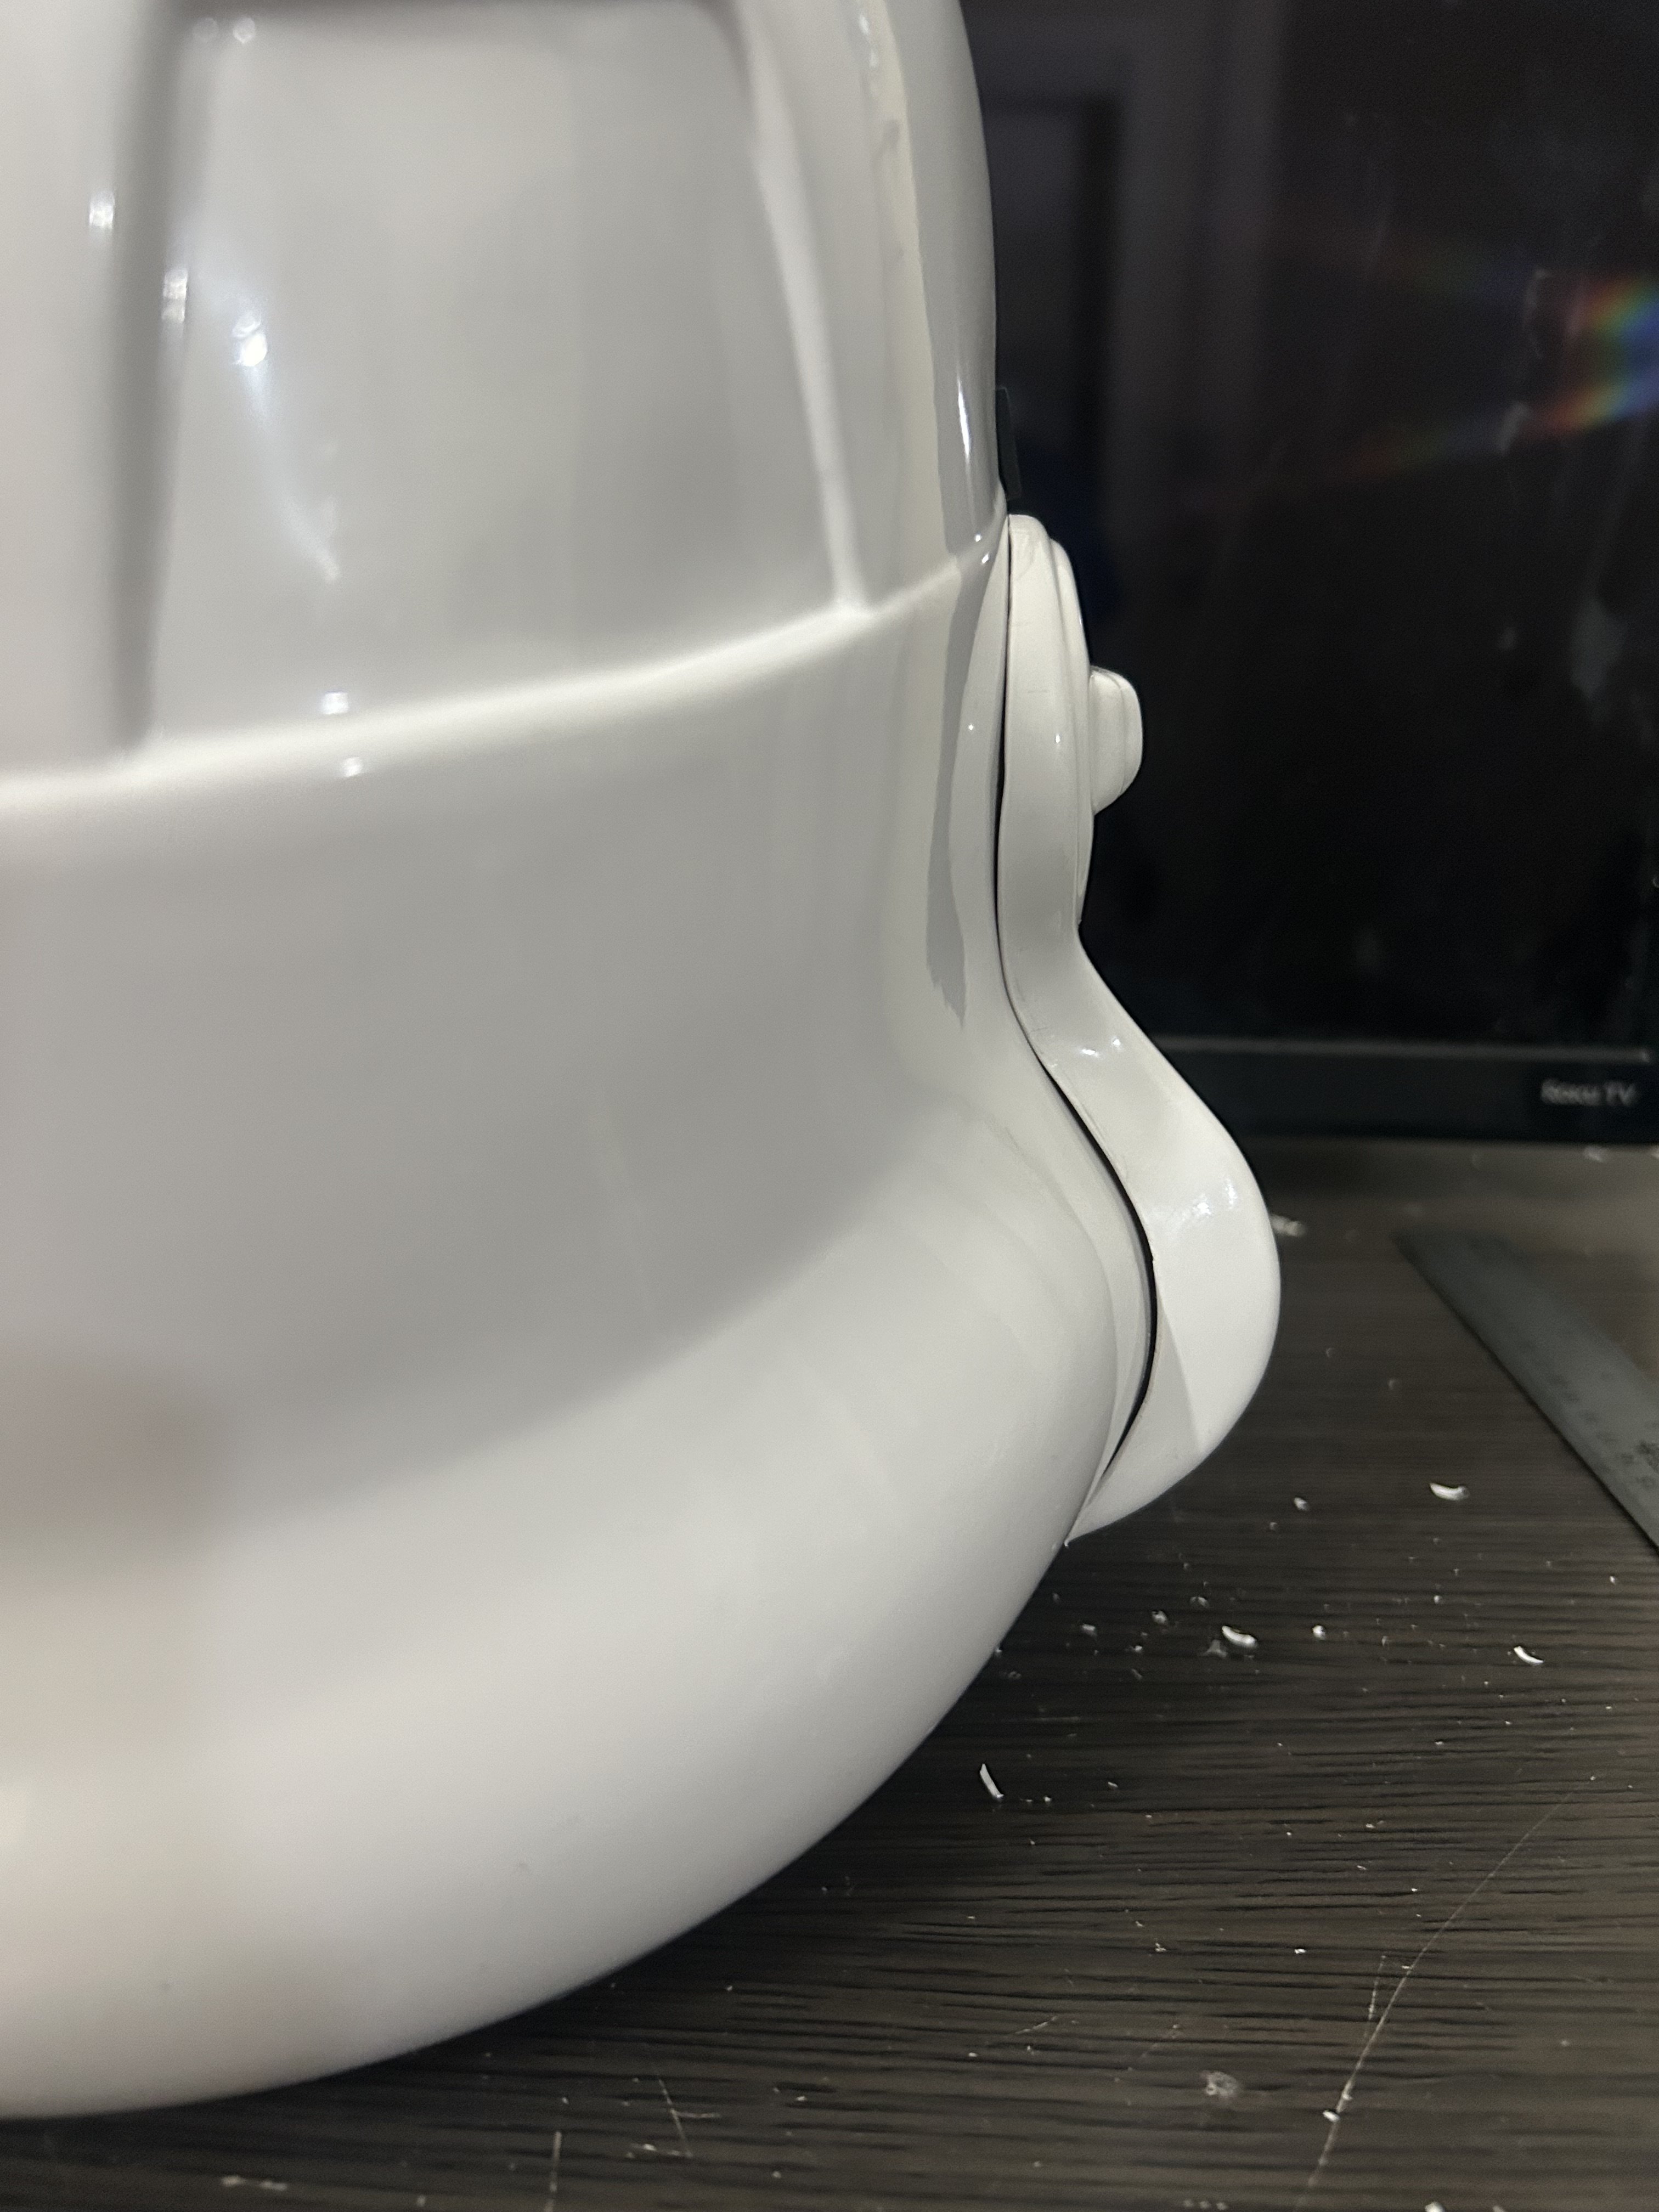
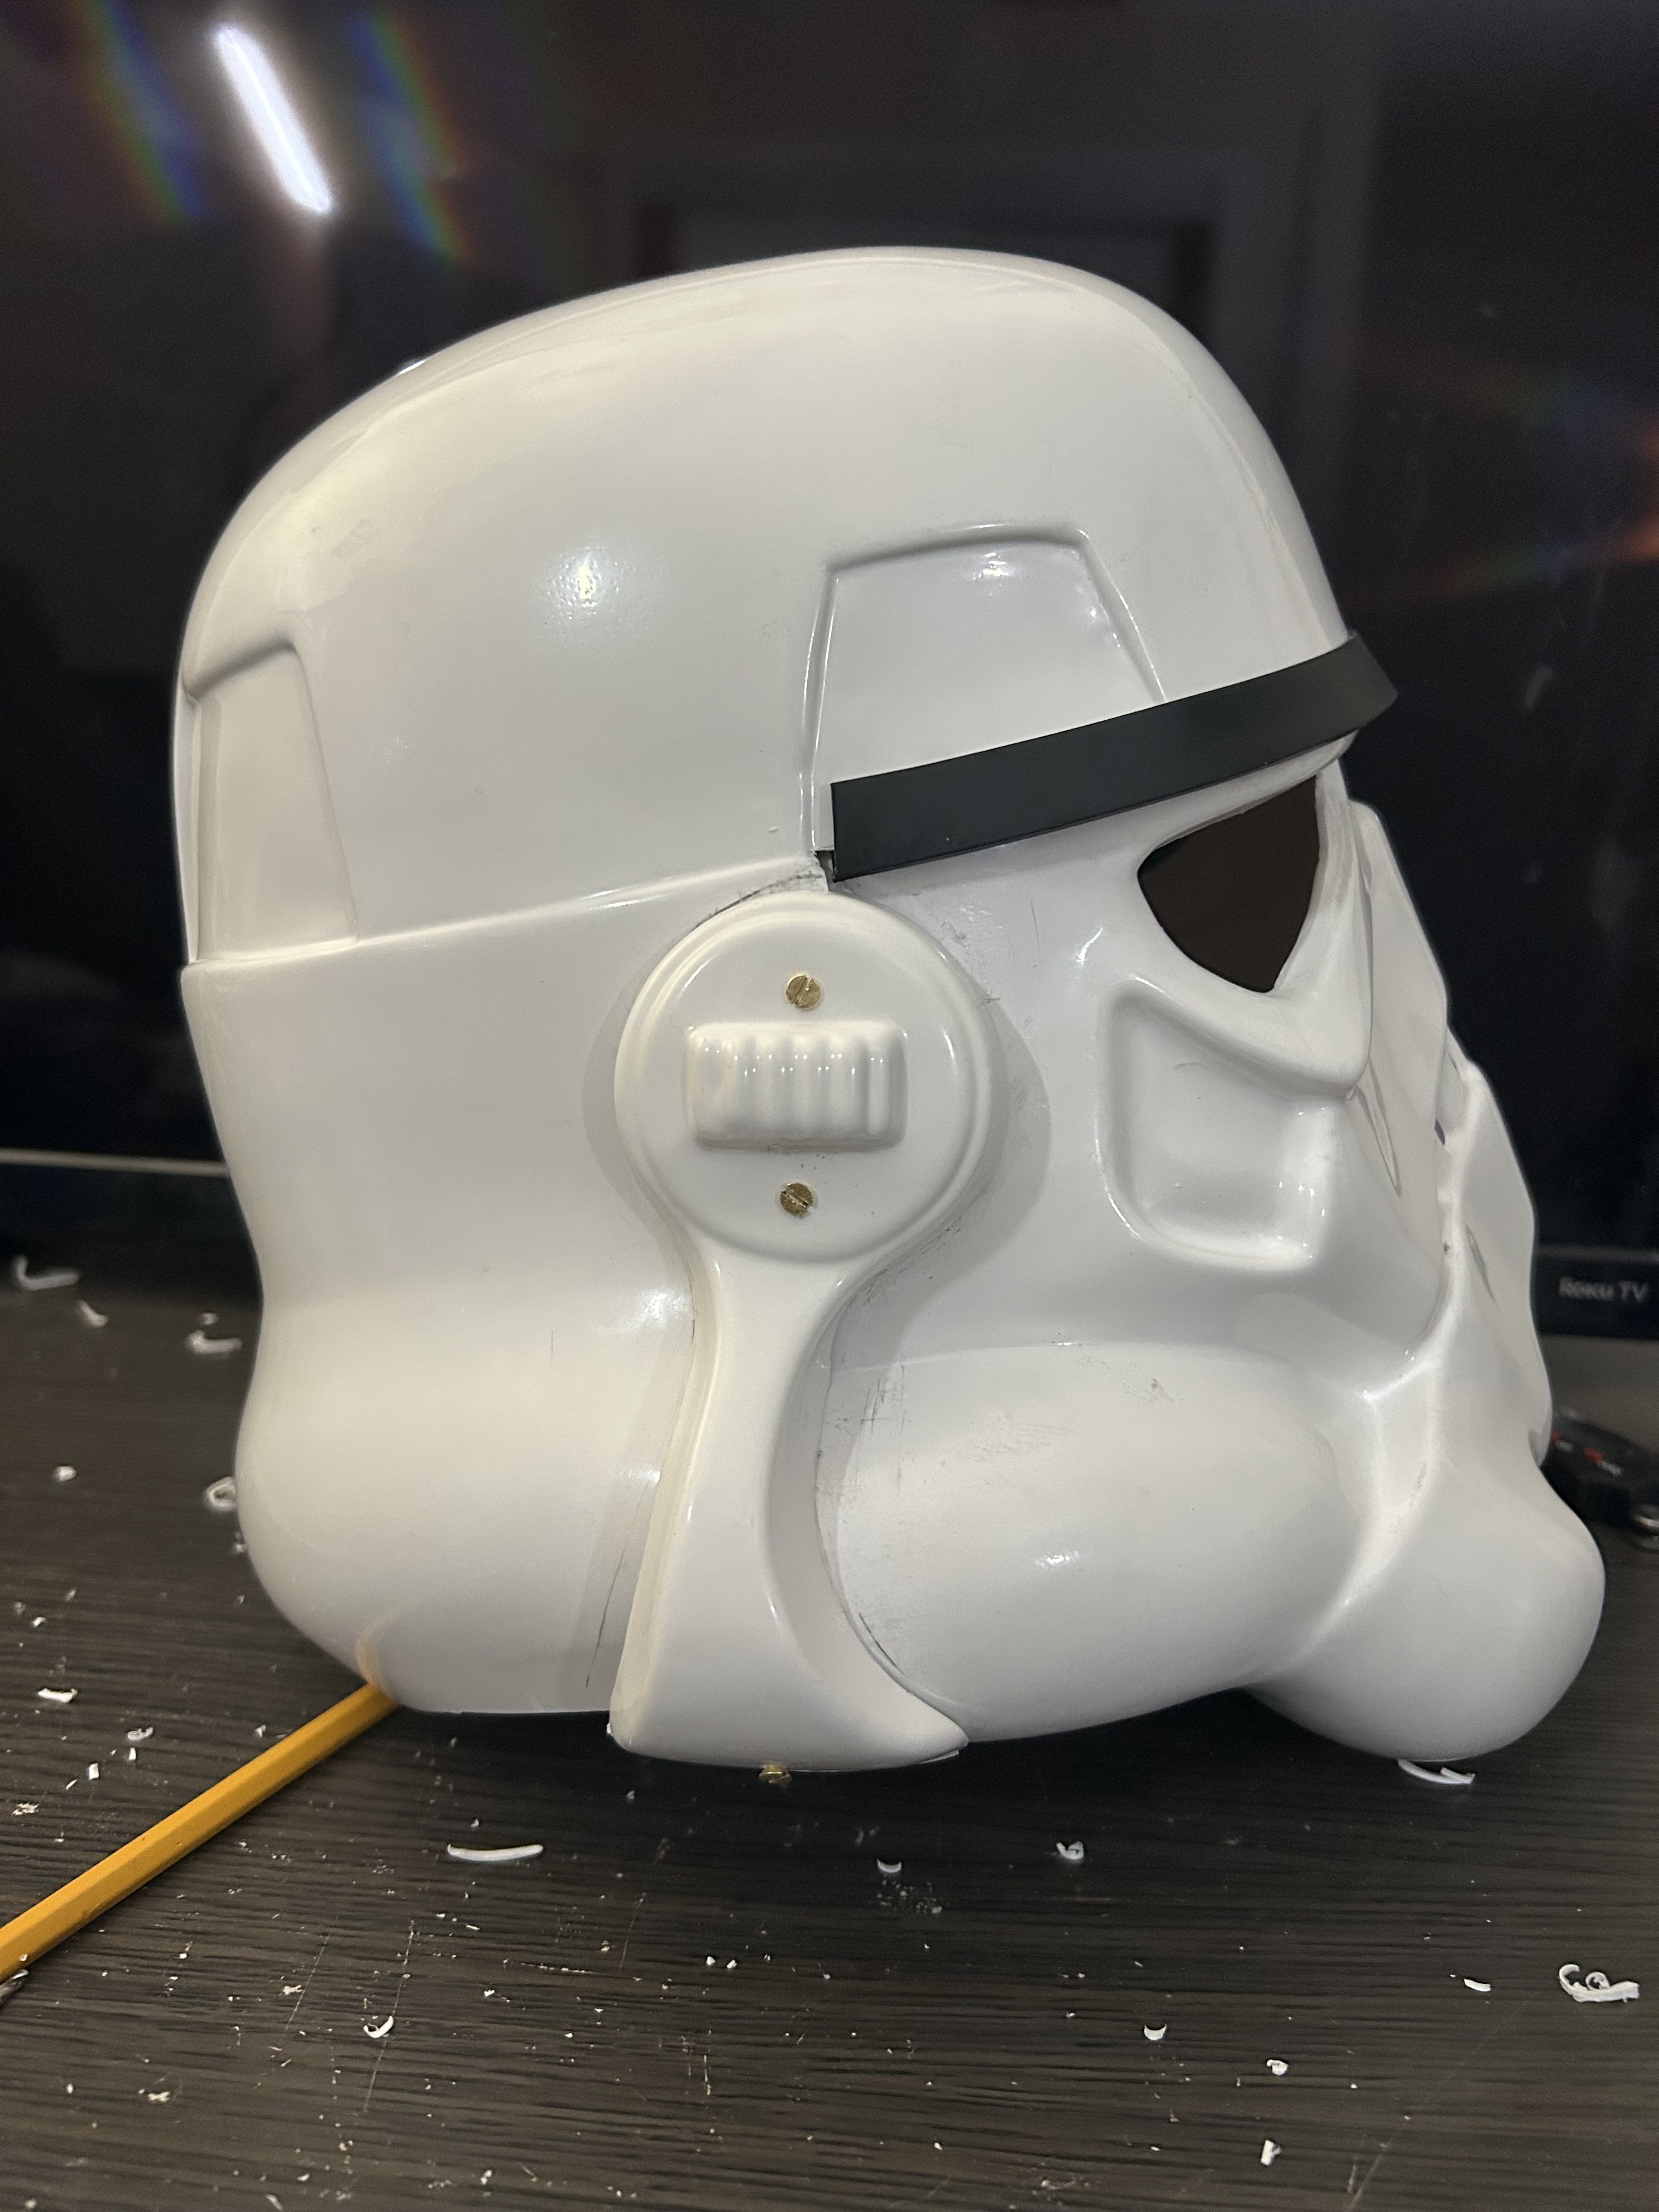
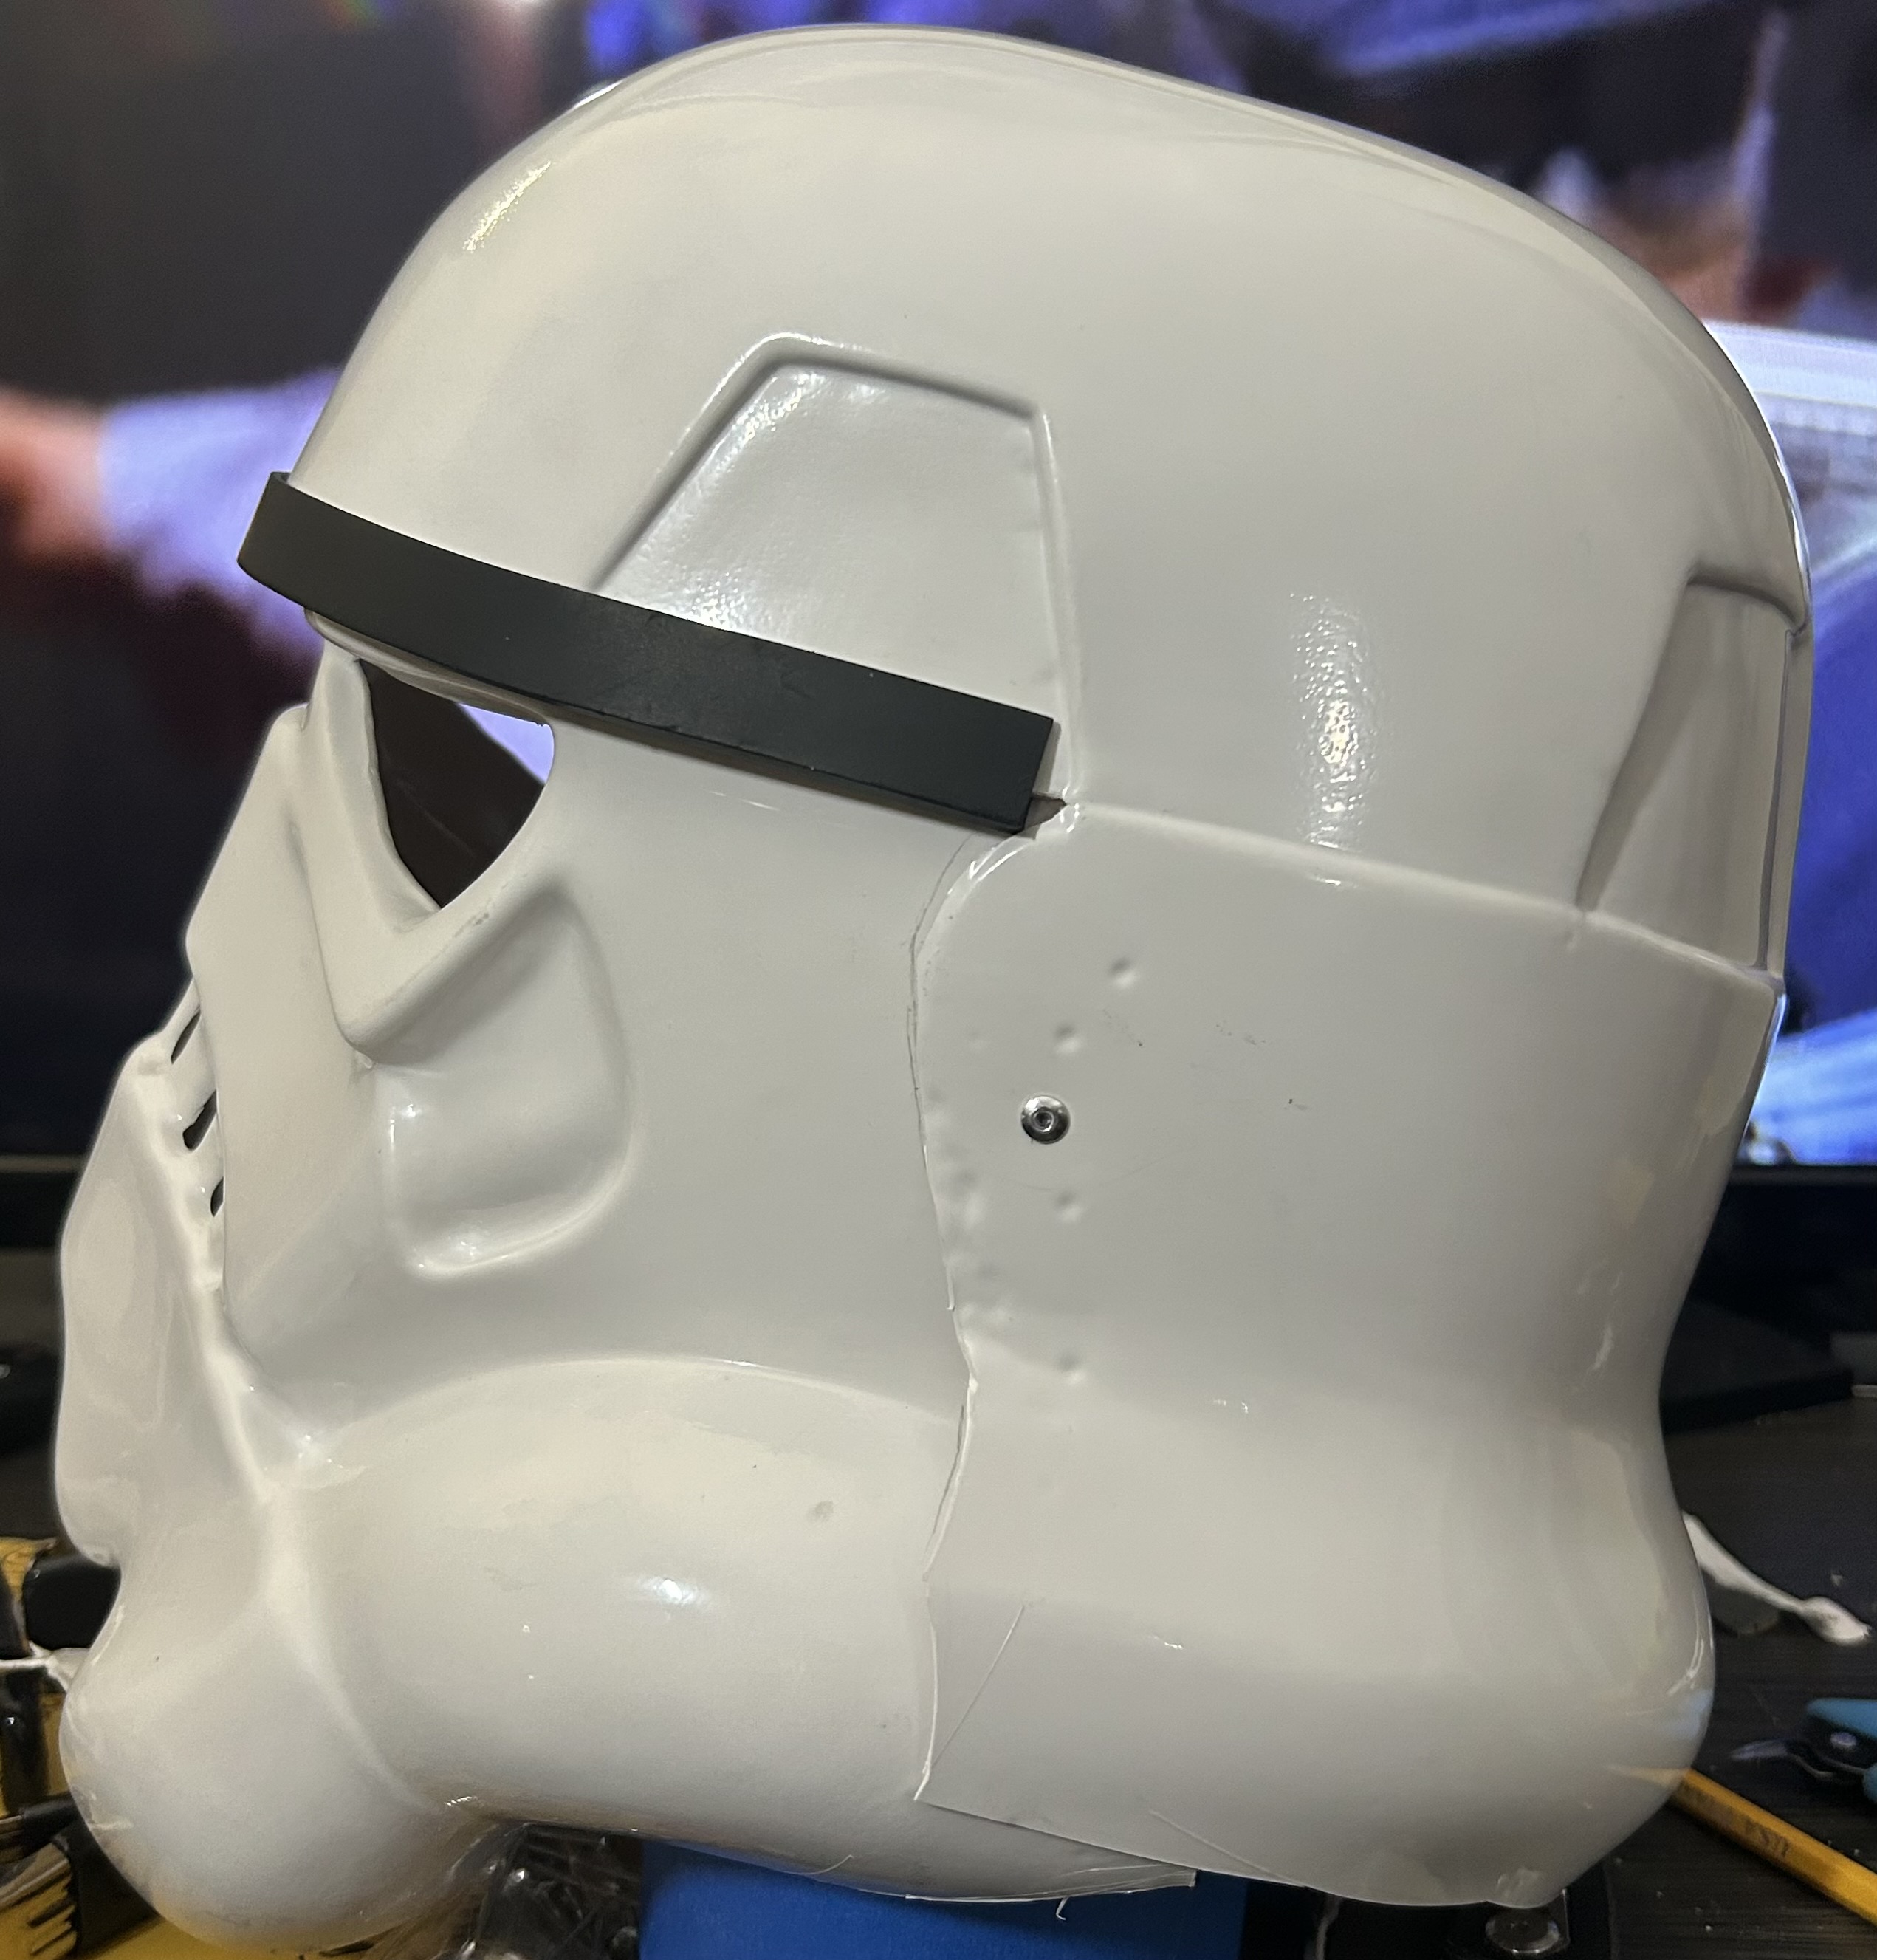
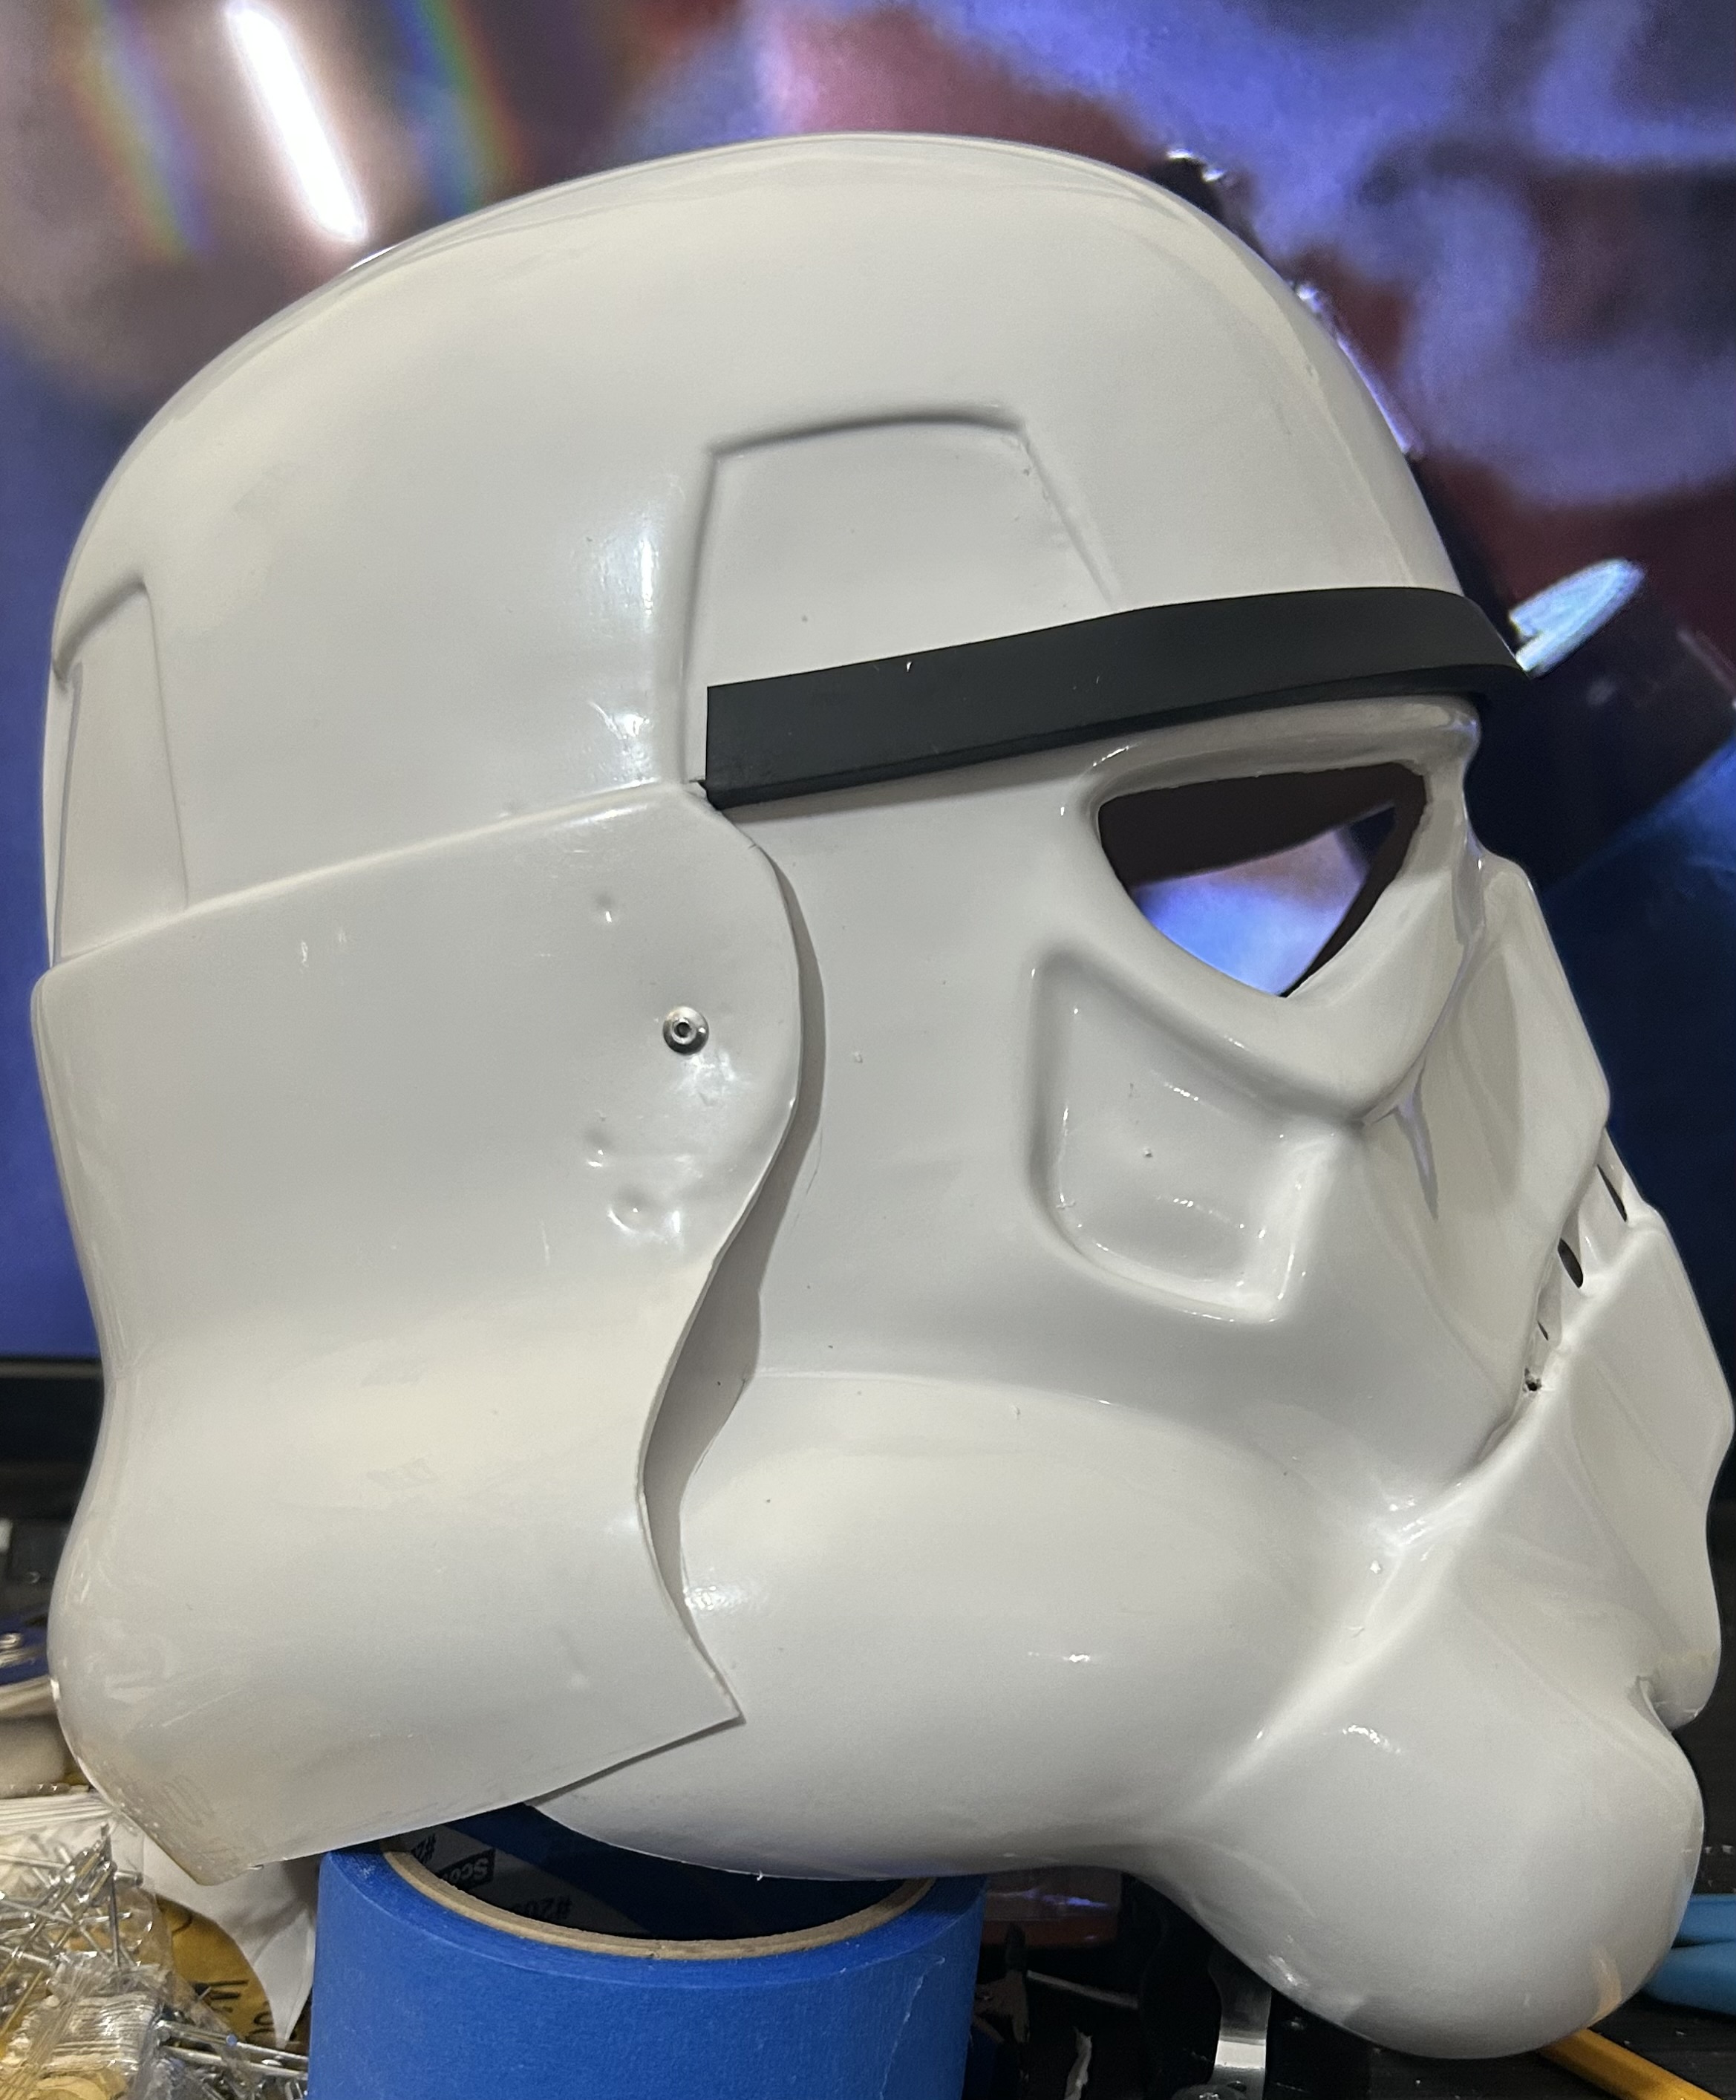
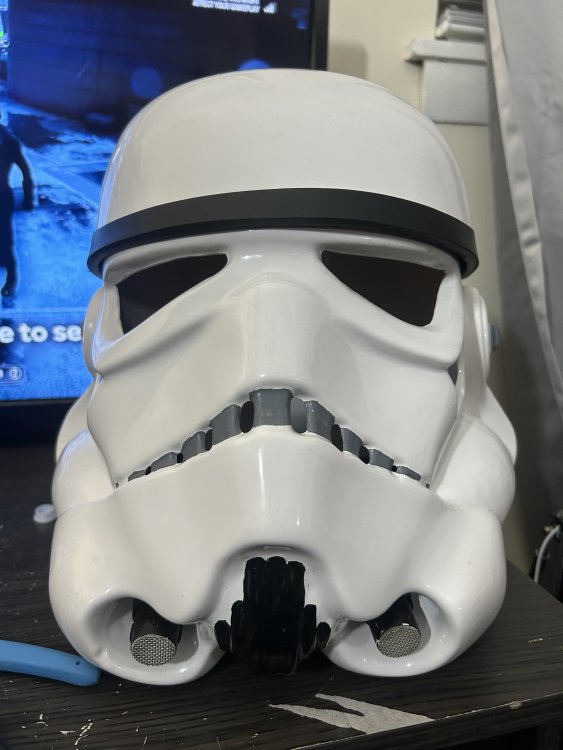
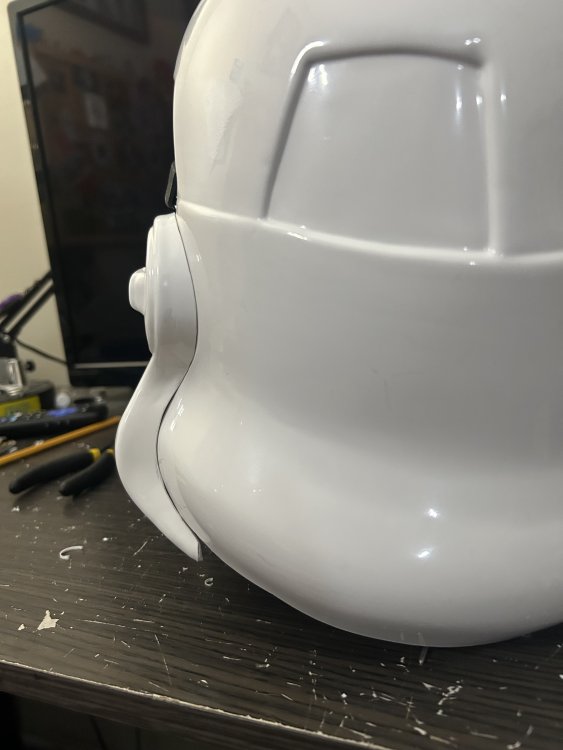
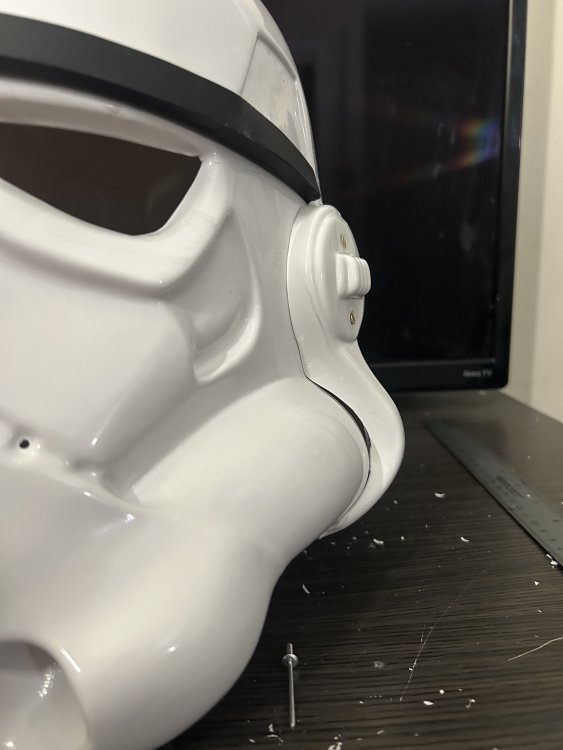
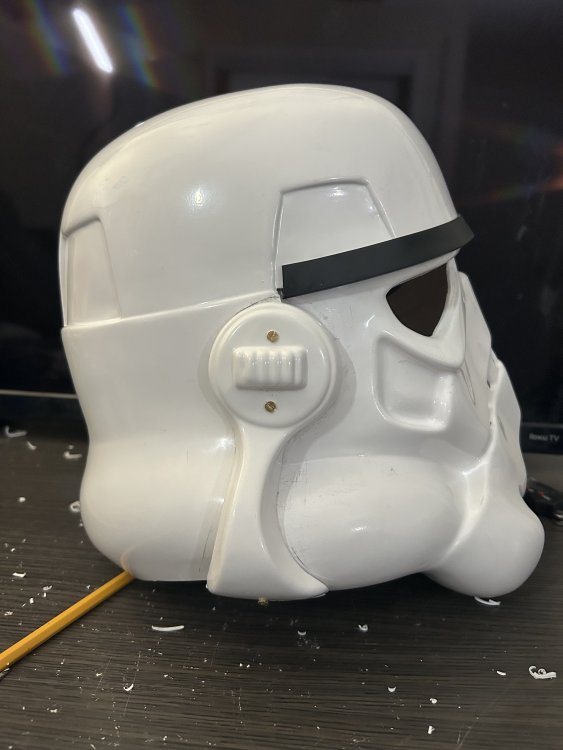
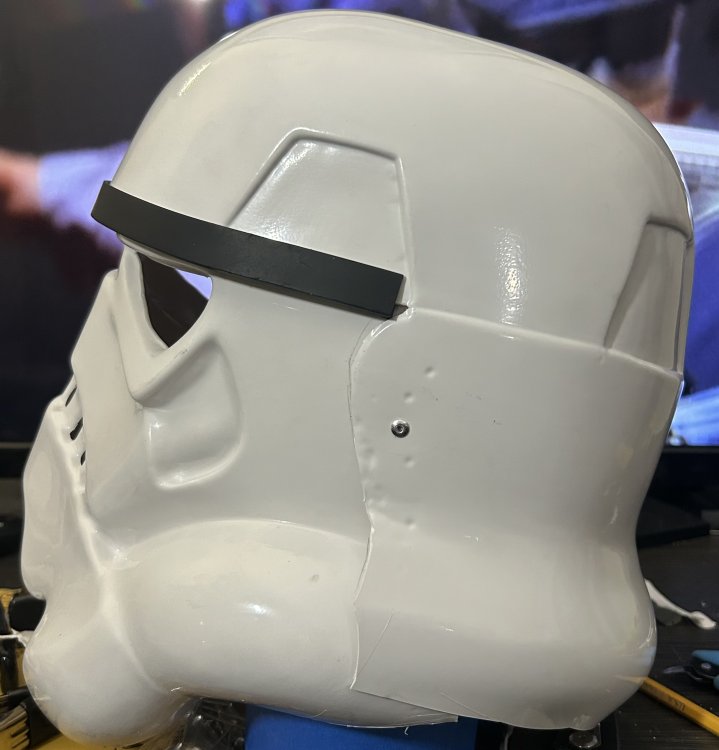
Got the second ear on and beveled the screw holes! Tried to get the left ear to have as similar as possible spacing and sizing to the right.


-
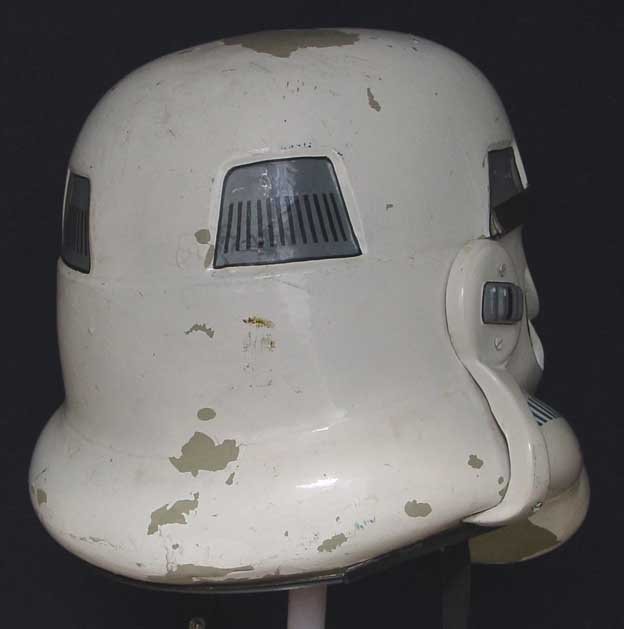
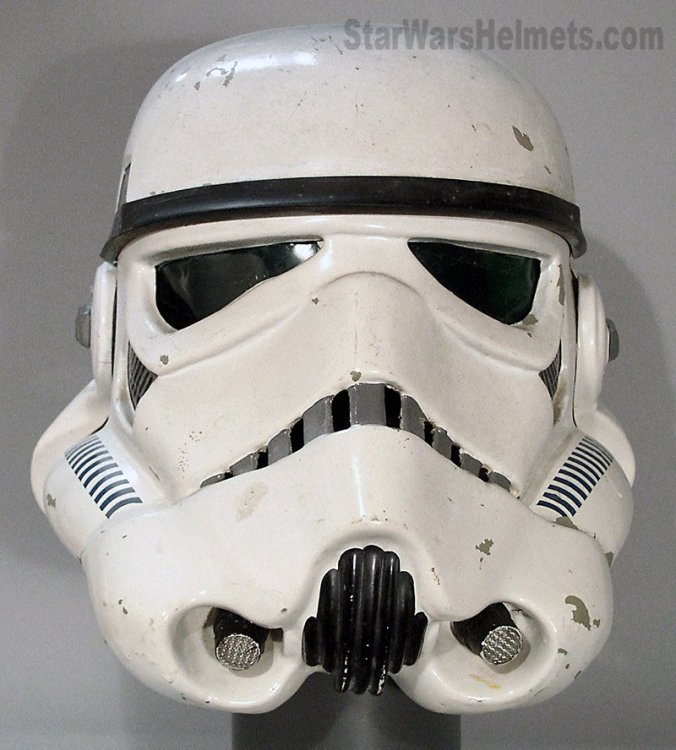
Seamless ears are a bit of a myth. This is an area you don’t want to pursue perfection over “good enough”. With that said, I would recommend hand sanding and filing your trim lines/edges to remove the jaggedness and smooth out the shape, especially on the front, and that would help overall appearance as well as help form the curves closer to the helmet shape. There’s a lot of trial and error and patience involved there until you reach a point you’re happy enough with it. If it was a little cleaner, I’d probably let it fly. The screen used helmets in ANH were rarely seamless if at all:
-
Added the first ear, kind of bugging over the less than seamless look but several build posts on the FISD forums says that its not the end of the world. Still looking for opinions on whether it'll fly before I start the next one. It should also be noted I have not beveled the screw holes yet.

-
 Event has been canceled due to temperature related safety concerns.
 -
Maulevolent’s TLJ First Order TK Build
Maulevolent replied to Maulevolent's topic in Costume Building
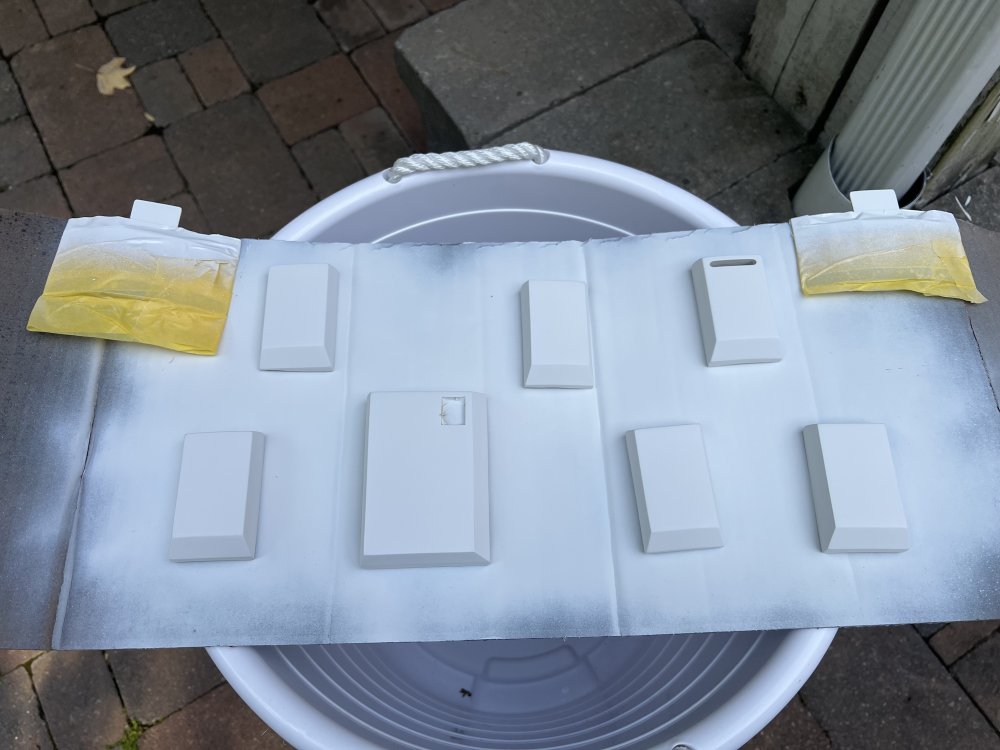
Progressing a bit more slowly this weekend but making progress nonetheless. I started assembling the forearms after trimming to approximately the proper TLJ shape: I also trimmed and assembled the abdominal plate and prepping it for ABS slurry fill on the side seams: and priming the resin boxes to go with it: My raw urethane resin spats also came in from Sanotized Creations. I’ll work on these as I get further in the build: Now to whip up a fresh batch of slurry for the seams and call it a night!


-
 Just realized I've got a conflict that night
 -
Good morning! The event coordinator confirmed that we are still on. She’s also asked if anyone would be interested in throwing out the first pitch so that is on the table for you all!
-
 Sorry I have to bow out of this event.
 -
Community Dinner - 06/24/25 05:00 PM to 06/24/25 07:00 PM
Russok replied to Lgrad's topic in Confirmed Event Discussion
Sorry I have to bow out of this event. -
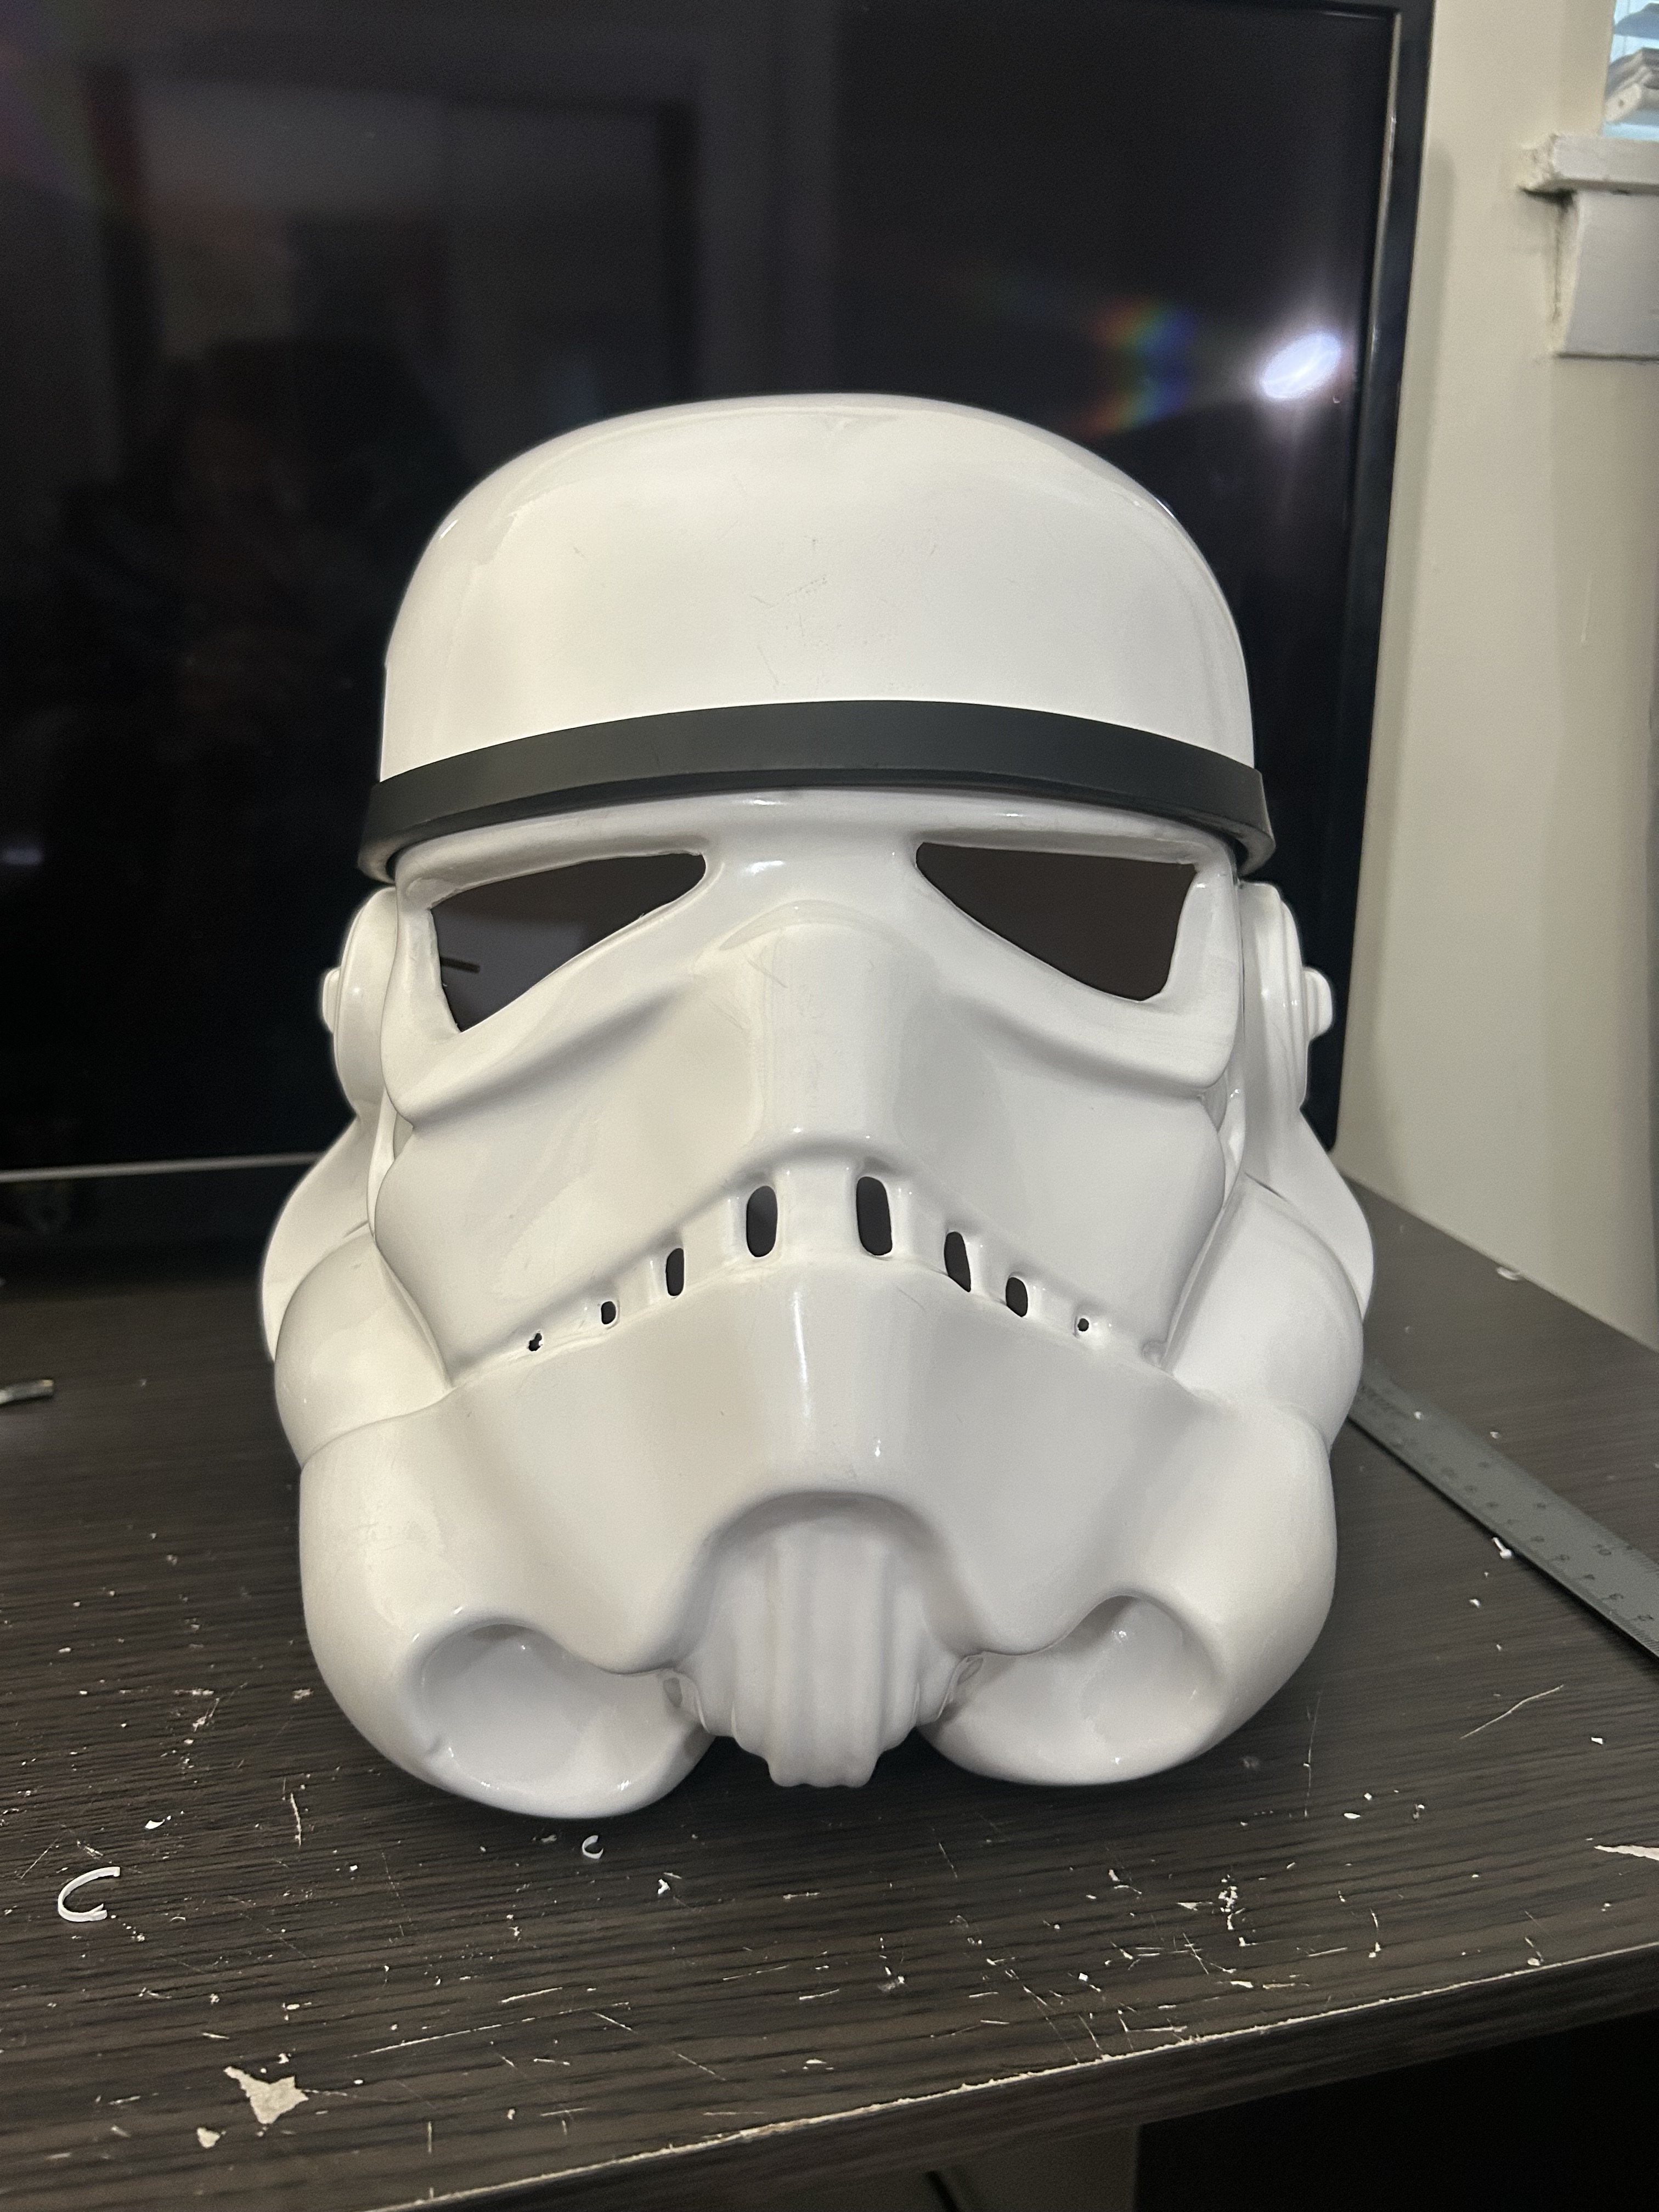
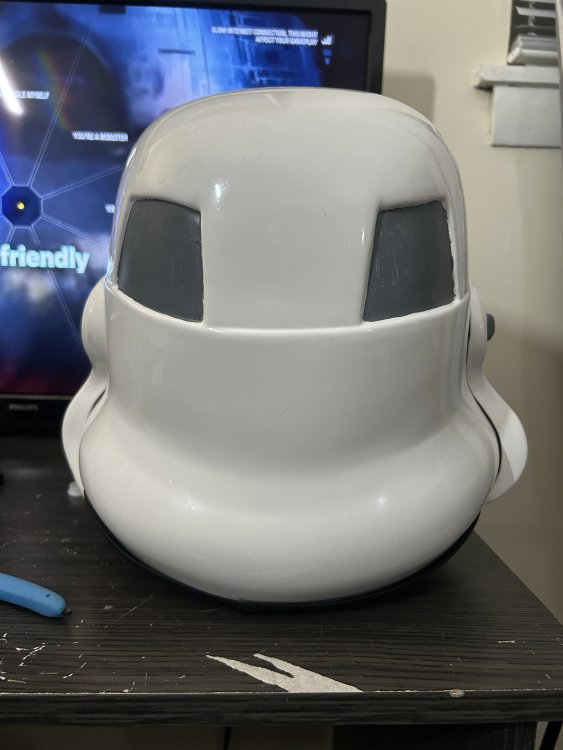
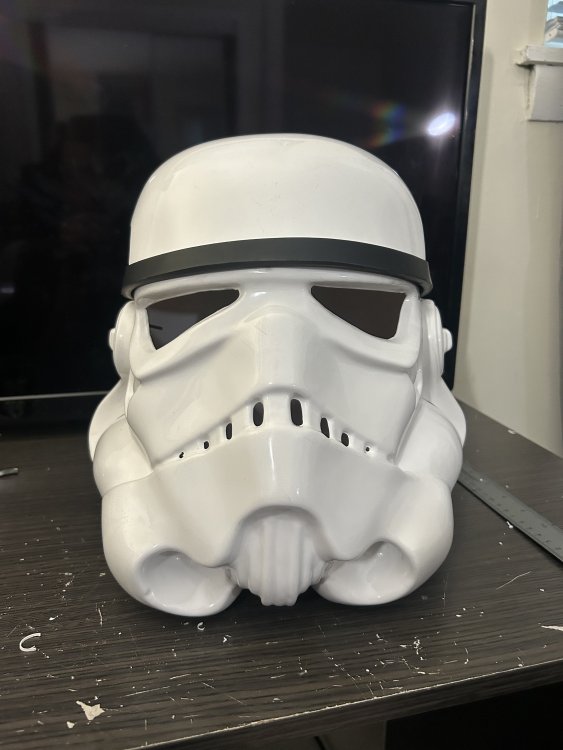
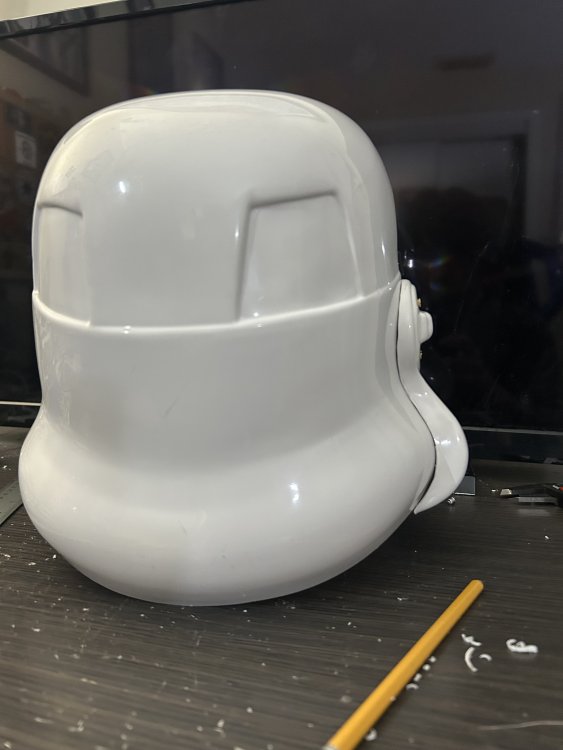
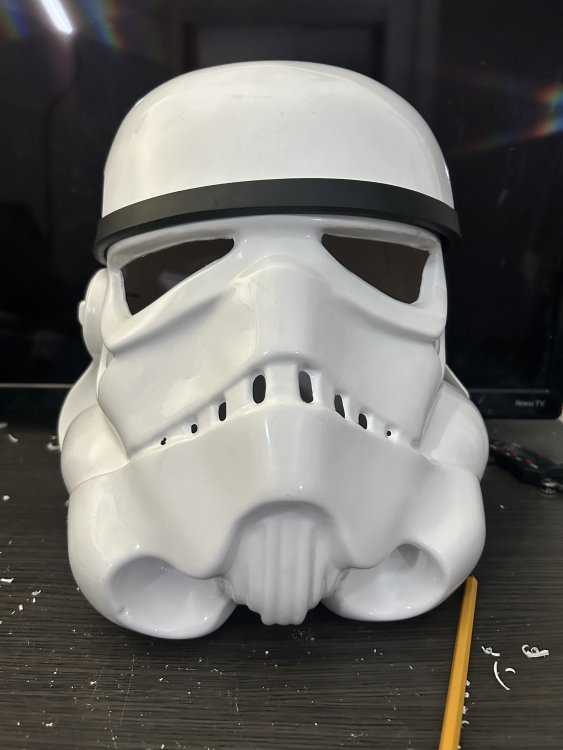
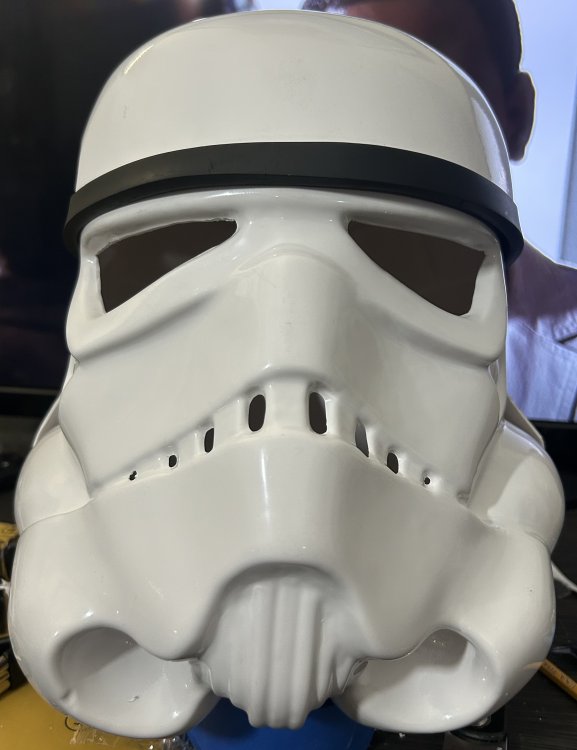
Trimmed out the eyes and teeth of the helmet and connected the front and back. Still some sanding to do but its coming together!

-
Good to have you on the boards! Love when i get to hang with your garrison!
-
Hello fellow troopers, It's your good buddy Wil here from the Northeast Remnant Garrison. I'm sure most of you have trooped with a good number of my garrison mates and I hope to join them one of these days! - Wil TS-29192
-
 wil129 changed their profile photo
 -
Boots are size 12, you will need to make your own flight suit as mine won’t fit you, the pouches are standard size for all bikers, and cumberbund can be either resized for you or make a new one, helmet is a lucasfilm licensed one and armor is from studio creations. I have two pair of gloves (one with lining and other without) blaster included. I have no pictures of it as it also is in storage