Swiftcloud Posted July 9, 2018 Share Posted July 9, 2018 So first off. Let me introduce myself. My name is Jerred. I am part Native American Indian and an enrolled member of??the Narragansett Indian Tribe in RI. My Native given name is Muckquetu Mattauqus, which translates to Swift Cloud. ??I have been a fan of Star Wars for as long as I can remember first going to see A New Hope in a drive-in theater when I was about 8 or 9 years old. I fell in love with just about all the wonderful characters from the story. And as time progressed and the next episodes were released, I became nearly obsessed with the franchise (as most my age did). But a few characters really stood out and made the strongest impression on me. The obvious were Luke, Han, Chewie, Leia, Vader, Yoda, C-3PO and his counterpart??R2-D2. But one of my favorites of all-time had hardly any screen time in comparison. And I was always intrigued by what was mostly un-known about him. His name was Boba Fett. I often imagine myself wearing his Mandolorian armor and flying about using his jet-pack while wielding his??blaster toward his target. Now that I have grown up and, dare I say, older,,,I have decided to try to make at least some of my youth fantasy of becoming Boba a reality. Minus the flying of course. But who knows what the future holds? I tried to take as many pictures of the building process as I could. But I sometimes found myself progressing so much further without stopping to snap a shot. So it???s not necessarily a step-by-step pictorial. More like snapshots of some key points of interest and proof of creation,??alteration and/or invention. Please keep in mind that when I started building Boba Fett, I was not really considering submitting him for 501st approval until I really started getter get more and more detailed in the process. So, some of my procedures may not necessarily be up to par with creating an approvable costume. It is still a work in progress and I am always open to suggestions and criticism. I???m not even really sure if what I am building will ever be approved. But I figured ???what the heck???? So here is my journal. At least a little at a time anyway. (I will add more in as I get the time to submit it, and as I continue with the process) ?? December 1, 2018 update: resubmitted photos for approval. Wish me luck. Link to comment
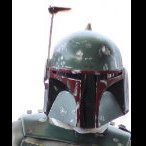
Swiftcloud Posted July 9, 2018 Author Share Posted July 9, 2018 (edited) So, it started with them helmet. I bought a Rubies helmet and thought it was a pretty good place to start from. Although there were some obvious issues with its accuracy. For starters, the visor was clear! That???s not supposed to be. Boba???s face was never visible in his helmet. So I added a layer of limosene window??tint. It???s dark! Almost black, but I can still see though it just fine. (In typical lighting conditions). ***update: I eventually switched??the Rubies bucket for a real one, later on in this thread.*** imI have a Cricut vinyl plotter that allowed me to print a nearly perfect visor shape precisely pre-cut to fit. The other obvious issue was the stalk on the visor. It???s too short. Probably because it was easier to box and ship with a short stalk? I eventually fixed this issue, but next thing was to focus on the horrible attempt at the damage effect brushed on the helmet. It looked like a 6 year old did it. Maybe that has some truth to it? Not sure. Anyway, I plan to totally repaint the helmet. But for now, I simply enhanced the effects by using a silver paint pen and sharpening the details of the damage areas. This may not be an approvable method, but it got me moving forward with the build. Edited September 27, 2018 by Swiftcloud Update Link to comment
Swiftcloud Posted July 9, 2018 Author Share Posted July 9, 2018 (edited) The next thing to do was to order some material to create the armor pieces. For this, I used sheets of plastic referred to as Sintra. I read some threads from a few online sources that recommended this material which was affordable and able to be ordered right on Amazon.com. ??I used printable PDF blue-print stencils that I found on ??bobafettfanclub.com. Because the blueprints were larger that???s my 8-1/2???x11??? printer, I had to print them in ???tiles??? that needed to be trimmed and taped together to get them to actual size. Then I traced them onto the sintra and began to cut them out using a jigsaw. Edited July 22, 2018 by Swiftcloud Typo Link to comment
Swiftcloud Posted July 9, 2018 Author Share Posted July 9, 2018 And then, using an electric heat gun, I began to heat and bend the peices into shape. I used the smooth, blunt end of a ratcheting spanner wrench to press dents into the plastic while it was still soft from being heated. Link to comment
Swiftcloud Posted July 9, 2018 Author Share Posted July 9, 2018 Painting and detailing the ???chipped??? paint to create the damaged look. This time around, I used cans of spray paint,??metallic silver and yellow paint pens to create the effect I was looking for. The shoulder bells and knee guards were brush painted using a golden yellow paint mixture that I got from Lowe???s Home improvement store. I only needed a little bit, so I was able to just buy sample sizes which kept it pretty affordable so far. Link to comment
Swiftcloud Posted July 9, 2018 Author Share Posted July 9, 2018 (edited) The cape was something I stumbled upon at my job. I found an old green canvas wall hanging shoe sorter that happened to be just the perfect size for his cape. I had the cut the threads and remove all the shoe pockets to get down to the flat piece of canvas that would be the cape. It already had grommets at the top corners that I will use to mount to the armor. And I bought a toy replica of the EE-3 blaster that was bright green and orange as shipped. I then painted it completely black and the handle brown. I used the same paint-pen technique that i used in the armor to create a worn and well used look to the blaster. I left the tip of the gun stay orange in color so that I wouldn???t have any problems if I wanted to wear the outfit at a comicon. The bolt cubes are made of Azec plastic wood, found at Lowe???s. I shaped them using a bench grinder and carved out the underneath to fit some square 1/4-20 nuts, which I glued in using my favorite glue ???Gorilla Glue???. It clear and super strong! Edited July 9, 2018 by Swiftcloud Link to comment
Swiftcloud Posted July 9, 2018 Author Share Posted July 9, 2018 (edited) Time for a quick fitting for the back armor and collar protector, along with the helmet and knee guards. I found that the back piece still seemed too skinny around my mid-lower back. So back to the heat gun to make that adjustment. Also, my knees are fairly bulky, due??to my bike riding and powwow dancing. When I tried on the knee guards, they fit very snuggly. Too snuggly, in fact. I tried bending down and one of them snapped in two! So I had to re-engineer them. Ended up cutting them all into 3 peices and mounting them to a short strap of metal. I put small peices of soft foam in between the peices to allow some flexibility. Repainted the cut areas and the foam. I think it looks pretty well disguised. And now can flex as I bend my knees, without snapping into pieces. meanwhile, I have placed my order for the soft suit to be custom tailored for me. A person who sells the custom made suits on eBay and Etsy promised to produce the suit pieces which will consist of a flight jacket, flack vest, neck wrap and spats in ROTJ style. i have also ordered the gauntlet kit as well, since this being my first build, I thought that gauntlets were a bit out of my novice builder league. So, while waiting for that stuff to come in, I had plenty of other areas to focus on.?? Edited July 9, 2018 by Swiftcloud Typo Link to comment
Swiftcloud Posted July 9, 2018 Author Share Posted July 9, 2018 Back to the??helmet. I placed another order, this time for the extended stalk piece for the range-finder. But the helmet still feels too light and creaky when I hold it. So I did a few things to add some rigidity to it. First, I lined the inside with some 1/8??? thin black craft foam and glued it into place. That haloed a little but it still felt kinda flimsy around the neck opening. So I traced the bottom of the helmet onto some sintra and cut out a ring about 1/2??? wide painted it black and glued it inside the opening. I had to file it and tweak it to get it to fit snugly, then used my trusty Gorilla Glue to lock it into place. Now it feel much more sturdy! Now I want to enhance the eye-piece on the range-finder. I had this idea in my head about making the viewing lens glow when the range-finder is pulled forward. So first, I found a fairly inexpensive LED accent light sold at the local craft store. It came in a 4-pack so maybe I???ll find other uses for the remaining 3. It was small enough to be able to be installed inside the eye-piece with a little bit of customization with a Dremel tool. I drilled out the fake lens and glued a plastic craft gem in its place. (I had to remove the shiny reflective paint on the back of the jewel in order for light to pass through it. To do that simply required some rubbing alcohol and a paper towel.) The lighted jewel gave me the effect that I wanted, but I needed to automate it???s on/off switch so that it would activate when the range-finder is pulled forward. To do this I would have to wait until the extended stalk piece came in the mail. Link to comment
Swiftcloud Posted July 9, 2018 Author Share Posted July 9, 2018 (edited) A few days later, I received the new longer range-finder stalk. Now I wanted to come up with a way for the light in the eyepiece to light when tilted. I considered a tilt switch, but could not find anything that would really fit inside the pieces. So, then I remembered I had some micro-switches left over from when i was a slot-tech at the casino. I decided to put the switch inside the rotor cuff thing at the base of the stalk. It was a little scary trying to pry the plastic housing off the helmet, thinking that it could crack and get damaged. But, surprisingly it came right off. Turns out, all that was holding it in place was two plastic clips and a tiny spot of hot-glue that wasn???t even really adhered too well. Turned out a couple of screws and was able to open the ???clamshell??? that pinned in the stalk. Using some Velcro, I attached the switch to the bottom of the stalk and ran a twisted pair of 22g insulated wire up to the eyepiece. To hide the wire, I wrapped the stalk with foil tape (tape made of thin metal used for attaching??heat/vent ducts).??This gave it the metallic look??and hid the wire very well. So, now, as the range-finder is lowered the switch gets pressed but the stalk at its vertical resting point and lights the LED in the eyepiece. As it is raised, the switch releases and shuts off the LED. upon testing, the result was successful, but the longer stalk seemed to want to fall forward too easily when I leaned the helmet over. So I glued in a rare earth magnet and wrapped a small piece of steel around the stalk at the height of the magnet. So now it???s held firmly in place when upright. But still comes down easily enough with a light push by hand. As a foresight, I re-attached the whole assembly back onto the helmet using Scotch Hook and Loop tape, so it can be safely??removed for future servicing or battery replacement. Edited July 9, 2018 by Swiftcloud 1 Link to comment
Swiftcloud Posted July 10, 2018 Author Share Posted July 10, 2018 Meanwhile, the soft suit gear still had??not arrived yet. So I started work on the girth belt. I ordered a belt from amazon and it came very quickly, but it was plain white and needed to be colorized. I read about a technique of using Minwax Stain to colorize the belt. Unfortunately, I realized that I bought oil based stain instead of water based. I was wondering why it seemed like it was just pouring off and not soaking in. So I waited a few days and when it was completely dry, I used another technique where I just sprayed paint on. This seemed to work the best, and once it was dry I just had to work it a bit to regain it???s flexibility. By the time I had finished the belt, my suit finally arrived. So, it was time for another fitting. The person that tailored my suit had used the measurements she requested from me so I was delighted to see that it fit me very well! I used a combination of rare earth magnets and Scotch hook and loop (extra strength hold). So far the peices seem to be holding very well. I glued magnets to the back side of the armor pieces and sewn them into the inner side of the flack vest. Link to comment
Swiftcloud Posted July 10, 2018 Author Share Posted July 10, 2018 The boots: ??I just cannot afford the $175 Man Of War boots at this time, since the cost of the soft goods and so many other pieces. Even tho they are perfect, I???m gonna have to put them on my wishlist. In the meantime, I had already made my own boots that will have to suffice for now. I bought some boots from Target that look pretty close to Boba???s boots. And they were only about $24 for the pair. With some add-on material I was able to replicate the look pretty well, I think. I just opted for painting the stripes instead of adding a cord bead, because I hope these are only a temporary use for boots. -I hope. I did airbrush some aging??and worn effects. To create the toe spikes I used a large 6??? metal hose clamp and cut away the threaded parts. Using a hammer and the anvil side of my bench vise, I flattened and creased the metal strips to fit around the front of the boots. The spikes are actually soft rubber plugs that I shaped into pointy cones, using a bench grinder. I chose to make them out of soft rubber because I was afraid that real metal toe spikes would not be allowed at comicons and the like. Once I shaped them I spray painted them silver metallic. I think they look pretty realistic and I know they are actually harmless. Link to comment
Swiftcloud Posted July 10, 2018 Author Share Posted July 10, 2018 (edited) Up next: the gauntlets. ? these were very tricky....To say the least. So, I received my plastic molded??gauntlet kits??and they were not quite as durable as I had anticipated. They claimed to be 2mm thick and they were, in a few spots. But mostly they seemed to be about .5 to 1mm on average. This made them very light and flimsy. There was also some splitting happening in a few corners. Also, they were very tight when I held them in place around my Popeye-like forearms. Modification would definitely be necessary if I am going to utilize this kit. Since I already paid quite a bit for them, I was not about to throw money away by discarding them. So, modification was my final decision. The first thing I needed to do was to make them feel more durable. As they were, it felt like an accidental impact would crush them like a plastic water bottle. So, I filled in the back sides indentations with air-drying modeling clay. This gave them some solidification and added strength. Next, I trimmed the sharp edges with a razor knife and tried re-fitting them. Still too tight. I had this idea of first wrapping my arms in sintra using the heat gun to mold them into a nice comfortable fit. Then, I cut back more of the plastic on the gauntlets and glued them around the molded sintra pieces. Much better! With a few areas ground of with the bench grinder, I was able to attach each piece together for a secure fit. I bought a long piano-style cabinet hinge and cut it to fit the inner seems of both gauntlets. After securing them, I had to come up with a solution for clasping them shut without any visible hardware, to keep an authentic look. i didn???t like the Velcro closure that most people opt for, because Velcro tends to lose its grip after excessive use. So I devised a new hidden closure. I attached some plastic wire clips to each end of the inside open sides. I cut a piece of 1/4??? copper tubing and inserted them into the clips. On the upper halves, I added another clip at each end - lining them up with the ends of the tube. Then I cut a 1/8??? diameter steel rod and curled one end. When the gauntlets are closed, you simply insert the steel rod through the clips and the copper tube which traps the gauntlets shut. That works!??It???s a bit unorthodox but actually works well. The only down-side is that it requires a helper to lock them in place. Time to paint them, attach the components??and add detail.?? Oops! While I was drilling the back of the flame thrower (made from a resin??cast piece) it cracked! So, using a few pieces of Azek plastic wood - sold at Lowe???s- I cut, dremmeled and shaped a new piece which is actually more durable than the resin??one. Now I could easily drill the end to attach the hose connectors. Which also were made from cast resin, which also cracked in half. So,back to Lowe???s I went. I bought some real brass flare end tube connectors and a couple threaded brass nipples (giggity!) and attached them. So much better now. i told you these were a pain in the ass! Edited July 10, 2018 by Swiftcloud Link to comment
Swiftcloud Posted July 10, 2018 Author Share Posted July 10, 2018 Using as much of the remaining sintra as I could, I decided to make the shin tools. Using a jigsaw and dremel, I cut and carved out the pieces. Painted and assembled them. I think they came out looking pretty good. Link to comment
Swiftcloud Posted July 10, 2018 Author Share Posted July 10, 2018 So I???m at the point now where all I can do is wait for my jet pack kit to arrive. I pre ordered it from Anovos in April. They claim to be shipping in summer, which is described by them as being anytime between June and September. It???s mid July now, so hoping it comes sooner than later. Until then, I will keep trying everything on and tweaking whatever needs it. I still need to airbrush some wear and tear markings on the suit. And I have been trying different ways to wire in the headset mic and voice changer that I bought on eBay. Plus I still need a solution for the LED chest display. I may have to break down and spend the $79 for the kit on eBay. But I???ll look for a cheaper solution first. I have some ideas. Here is some detail photos of the most recent test fitting. when the jet pack kit comes in, I will continue to update this thread. Hope it is soon! Link to comment
Alay Posted July 11, 2018 Share Posted July 11, 2018 Amazing amount of effort put in so far and a fantastic build thread to follow!?? Thanks for so many detailed pictures. I'd strongly recommend you get in contact and echo this build thread to The Dented Helmet and The Bounty Hunter Guild Detachment.?? The Detachment is very strict and heavily involved in all "face" character approvals, and will likely give you the best advice for reaching 501st approval. Your gauntlets came out nicely!?? I like the DIY on the tools as well; if you want help casting them into Resin off the sintra and wood let me know Unfortunately I'm very skeptical of that helmet being approvable.?? The form of the Rubies helmet by itself may be too inaccurate--the visor seems "wider" in the center than the original helmets.?? The Bordon connector (the little nub on the right side) usually has 3 holes rather than the two it looks like the Rubies has.?? I would suggest asking over at the Bounty Hunter Guild as they're the experts. Also, the paint color and weathering on Boba Fett needs to be exactly matching a film portrayal of a particular Fett costume.?? The ROTJ Fett has a couple of versions so you have some variety to pick from, but the detachment wants it spot on to one version before they'll give the thumbs up on a costume.?? Again, I'd suggest working with them for resources!?? ??I don't mean to discourage you, you've done marvelous work so far! I just don't want you to get too far ahead on your build and find out you need to rework major aspects of it--I've had that happen before and it can really take the wind out of your sails If you need any help along the way feel free to ask!?? I and many others are always ready to help Garrison Web Master | First Imperial Stormtrooper Detachment Leader Emeritus ANH Stunt Stormtrooper - Centurion | ESB Line Officer - Imperator |Dengar - Approved Heavy Weapon Trooper - Centurion| ESB Stormtrooper- Approved | Admiral Daala - Approved| Jodo Kast - Approved Link to comment
Swiftcloud Posted July 11, 2018 Author Share Posted July 11, 2018 (edited) Thank you Alay for you kind words and suggestions. I will definitely contact those other blog sites that you mentioned. I know the Rubies helmet is not really the best piece to try to work with due to its inaccuracies. But I just can???t afford a $300 custom built one just yet. Which is also why I didn???t get too involved with making the paint job and damage effects look perfect. At some point I will start a new, more accurate, helmet build. Again, this build started out to be more of a Halloween costume at first, so I hadn???t even considered the guidelines of the 501st approval. Only after I started getting more involved is when I decided to at least start leaning toward the possibility of an approvable finished product. But I understand that there are some major changes that will need to be made before I can consider trying to get approved. I figure that I will makes those changes a little at a time as my finances eventually will permit. I consider this, as my first costume build, to be sort of a learning experience that I can build on and make adjustments as I go. Hopefully, someday I will have a product that I will be proud to submit for approval. Until then, I???ll just keep plugging along Again thank you for you advice and critique. That is exactly why I joined this site and posted my progress. Hope to be a full fledge member some day!! ? -Jerred Swiftcloud Edited July 11, 2018 by Swiftcloud Typo 2 Link to comment
Backpacks Got Jets Posted July 11, 2018 Share Posted July 11, 2018 Jerred, I love your enthusiasm. As you work on?? your kit, if your goal is approval, before you make purchases or execute what can often be very time consuming tasks, blast this board with questions and advice.?? It can save you a lot of time/effort/money. ?? Excited to see how this goes. Link to comment
Alay Posted July 11, 2018 Share Posted July 11, 2018 51 minutes ago, Swiftcloud said: Thank you Alay for you kind words and suggestions. I will definitely contact those other blog sites that you mentioned. I know the Rubies helmet is not really the best piece to try to work with due to its inaccuracies. But I just can???t afford a $300 custom built one just yet. Which is also why I didn???t get too involved with making the paint job and damage effects look perfect. At some point I will start a new, more accurate, helmet build. Again, this build started out to be more of a Halloween costume at first, so I hadn???t even considered the guidelines of the 501st approval. Only after I started getting more involved is when I decided to at least start leaning toward the possibility of an approvable finished product. But I understand that there are some major changes that will need to be made before I can consider trying to get approved. I figure that I will makes those changes a little at a time as my finances eventually will permit. I consider this, as my first costume build, to be sort of a learning experience that I can build on and make adjustments as I go. Hopefully, someday I will have a product that I will be proud to submit for approval. Until then, I???ll just keep plugging along Again thank you for you advice and critique. That is exactly why I joined this site and posted my progress. Hope to be a full fledge member some day!! ? -Jerred Swiftcloud Totally get ya Jerred!?? You got a great attitude and you'll get to approvable, I'm sure of it ?? Along the way, if you need any help, have any questions, etc... just ask!?? I'm working on a similar-but-different bounty hunter right now, and have plenty of extra parts for electronics and stuff if you need 1 Garrison Web Master | First Imperial Stormtrooper Detachment Leader Emeritus ANH Stunt Stormtrooper - Centurion | ESB Line Officer - Imperator |Dengar - Approved Heavy Weapon Trooper - Centurion| ESB Stormtrooper- Approved | Admiral Daala - Approved| Jodo Kast - Approved Link to comment
Swiftcloud Posted July 28, 2018 Author Share Posted July 28, 2018 Just got my ManOfWar ROTJ gloves and the LED chest light in the mail today! The gloves look great, although I am having a hard time getting my bear paws??past the cuff. Luckily, my mother is a wiz with the sewing machine, so I???ll be bringing them to her for an adjustment.?? ??Also, I am getting ready to repaint my armor with better detail and I am considering repainting my helmet too. Just until I can get my hands on a better bucket. The one I have is??a pre-painted Rubies helmet that I modified. I???ll just repaint it to more closely match the ROTJ details until I can build a better one. Still waiting on Anovos for my jet pack. Hope it comes in soon because there are comicons popping up all around me lately. ? 1 Link to comment
Swiftcloud Posted August 5, 2018 Author Share Posted August 5, 2018 Latest progress: ??Well??I am, still??patiently, awaiting my jet pack kit. In the meantime I have made some additions to the armor. I added the chest LED display. Rather than glueing the circuit board onto the chest plate, I have opted for a removable method. Mainly because I do plan on upgrading my armor to aluminum at some point in the future. This way, I can take the display and re-use it when needed. To do this, I simply cut some rubber tubing (left over from the gauntlets) down the center the long way. I glued them in place in a sort-of frame shape to hold the circuit board in place. Seems to work nicely. -Gorilla Glue saves the day yet again. ??Like I mentioned before, I have decided to just repaint my current helmet because I just can???t afford another $200 to $300 for a new bucket at this point in time. And I have some time to kill, while waiting in the jet pack. So I started the paint job. Besides, it is a good practice project for when I do have a new one to paint. I am using the layered method with liquid mask for the damage effects. It???s easy, and difficult at the same time. Lol. But it seems to be coming out ok, I guess. Still too early to tell. I shaved the nibs off the range-finder snap tabs. And modified the earpiece so I can connect it with screws. Now it can easily be removed/replaced. ??****I need a better ROTJ style RF lens housing. The Rubies one sux!**** ??I???ve only gotten to the 3rd layer of paint for the bucket. So it looks kinda funny right now with just the metallic silver, primer grey and the green. But the effect looks pretty good so far. The hardest part is remembering where the latex mask is under the paint. I am using the CRL pictures as a reference. Here???s the pics... ?? Link to comment
Swiftcloud Posted August 5, 2018 Author Share Posted August 5, 2018 On 7/11/2018 at 1:47 PM, Alay said: Totally get ya Jerred!?? You got a great attitude and you'll get to approvable, I'm sure of it ?? Along the way, if you need any help, have any questions, etc... just ask!?? I'm working on a similar-but-different bounty hunter right now, and have plenty of extra parts for electronics and stuff if you need You mentioned having extra electronic parts. Would you happen to have an extra set of the flashing LEDs for the range finder? If so, willing to sell? If not, do you know where I can get one? Also, I need a better RF housing. Any suggestions? Link to comment
Alay Posted August 5, 2018 Share Posted August 5, 2018 10 hours ago, Swiftcloud said: You mentioned having extra electronic parts. Would you happen to have an extra set of the flashing LEDs for the range finder? If so, willing to sell? If not, do you know where I can get one? Also, I need a better RF housing. Any suggestions? I have some blank PCB you can cut, as well as tiny LEDs and a couple capacitors if you wanted to make a time blinky switch.?? The only part I was having trouble sourcing was a push button tiny enough to fit in front of the stalk. PM me your address I can wrap some up and mail your way sometime next week if any of that would be useful. Garrison Web Master | First Imperial Stormtrooper Detachment Leader Emeritus ANH Stunt Stormtrooper - Centurion | ESB Line Officer - Imperator |Dengar - Approved Heavy Weapon Trooper - Centurion| ESB Stormtrooper- Approved | Admiral Daala - Approved| Jodo Kast - Approved Link to comment
Swiftcloud Posted August 5, 2018 Author Share Posted August 5, 2018 35 minutes ago, Alay said: I have some blank PCB you can cut, as well as tiny LEDs and a couple capacitors if you wanted to make a time blinky switch.?? The only part I was having trouble sourcing was a push button tiny enough to fit in front of the stalk. PM me your address I can wrap some up and mail your way sometime next week if any of that would be useful. Actually, I have been working on a circuit for that. It just requires a few resistors, caps and LEDs as you mentioned. I could try to locate the parts from online catalogs, but if you have extras, I???m down! I have the micro switches already. I???ll PM you. Thanks a bunch! Link to comment
Swiftcloud Posted August 6, 2018 Author Share Posted August 6, 2018 More progress. I am determined to make this helmet look more like the real thing. It started out as a Rubies with the most awful paint job. And it was painted as??the ESB version. I have done a lot of things to make this look more realistic. I think it???s coming along nicely. Got some small details to apply still. (I still have to install??the circuit board and dental files for??the rear vent.) But, I think it???s looking pretty good so far. 1 Link to comment
Jimbo Posted August 6, 2018 Share Posted August 6, 2018 Looks great Kemosabe ! Not sure why Rubies stuff gets such a??bad rap....your helmet and their Vader helmet are pretty decent starting points. I mean, look at what you did; great customization to your particular character. 1 Jimbo ANH Sandtrooper TD-11506 Link to comment

Recommended Posts